


wix studio
Working with Docking, Margins and Padding
In an ever-changing world of devices, it’s important to control your elements' position so they look just as you want on different screen sizes. In the Studio Editor, elements are automatically docked to make sure that happens.
This gives you the freedom to move elements around, without having to worry about positioning across breakpoints. However, you can always set the position, docking and margins on your own from the Inspector panel.
Go to our Wix Studio Academy to check out additional Wix Studio webinars, tutorials, and courses.
In this article, learn more about:
Positioning elements on the canvas
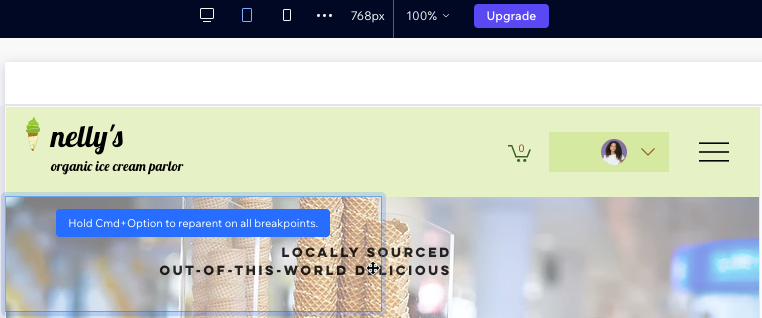
Using drag and drop, you can set your element's position directly on the canvas, separately for each breakpoint. This allows you to ensure that the element truly looks in place on every screen.
As long as the element remains within the same parent (e.g. section, cell), you can move it around and it does not affect other breakpoints. If you move an element to a different parent (reparent), it applies to all breakpoints.
X and Y coordinates in the Inspector
You can check your element's X and Y coordinates to see its exact position on the current canvas size.
X: The horizontal plane, from the left edge to the right edge of the parent element (e.g. section, container, stack).
Y: The vertical plane, from the top to the bottom of the parent element.
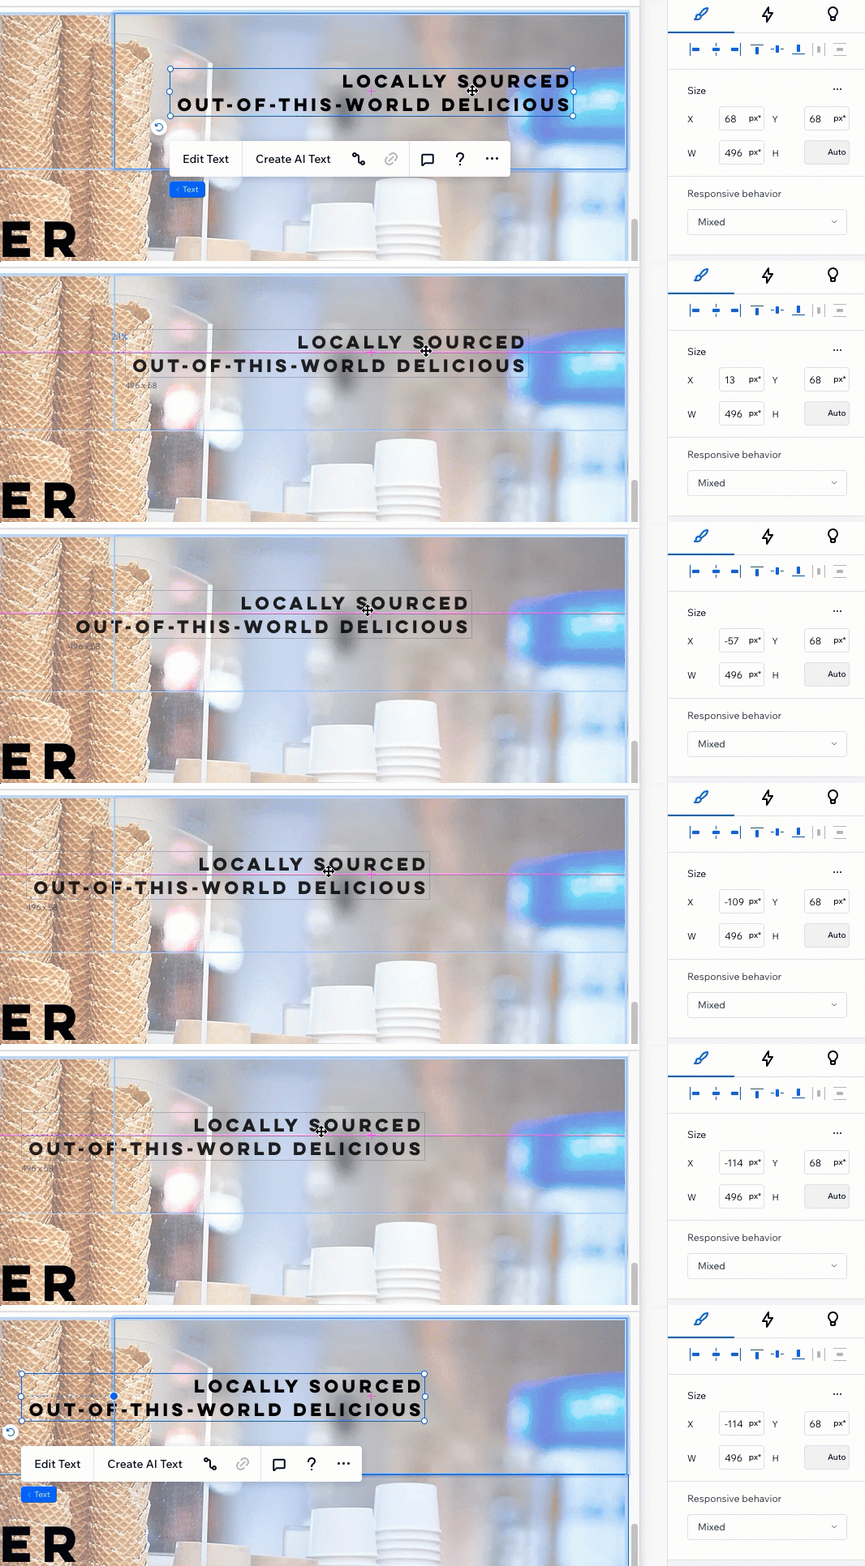
In the example below, you can see the px* value turn negative as we're moving the text element outside of its parent element - the cell.
What's px*?
px* is a unit of measure in the Studio Editor, showing you the "pixels on canvas". The px* value you see is the pixel equivalent, relevant to your current canvas size. Switch to a different breakpoint to see how the px* value changes automatically.
Automatic and manual docking
When adding a new element in the editor, it's automatically docked to ensure it stays in place on all screens and devices. However, you can always disable auto docking and choose the docking points manually.
Click a topic below to learn more.
Automatic docking in the editor
When you add a new element, it's automatically docked to both:
The top of the parent element (e.g. section, container, stack).
The left or right edge of the parent element - whichever is the closest.
You can move elements freely and the docking points adjust for you - no need to "re-dock".
The docking position is indicated by the dotted lines on the element, and the docking points in the Inspector panel (under Position). In the example below, the text element is automatically docked to the top and right sides of the cell.

Adjusting the docking manually
You can override the automatic docking and set it manually from the Inspector. This is useful, for example, when you want to dock an element to the bottom instead of the top.
Dock an element to any side; to the top, bottom, left, right or center of the section, container, or cell it's in.
Select the relevant element.
Click the Open Inspector icon
 at the top right of the editor.

Scroll down to Position.
Click the relevant docking points (top, bottom, right or left). Alternatively, click the Align to center icon
 so the element is always in the center.
Note: This automatically deselects the Element auto docks checkbox.

Using margins when docking elements
When an element is docked, margins help keep a set distance between the element and the edges of its parent. You can add margins to the sides that aren't docked as well. Margins act as a buffer, preventing overlaps with other elements.
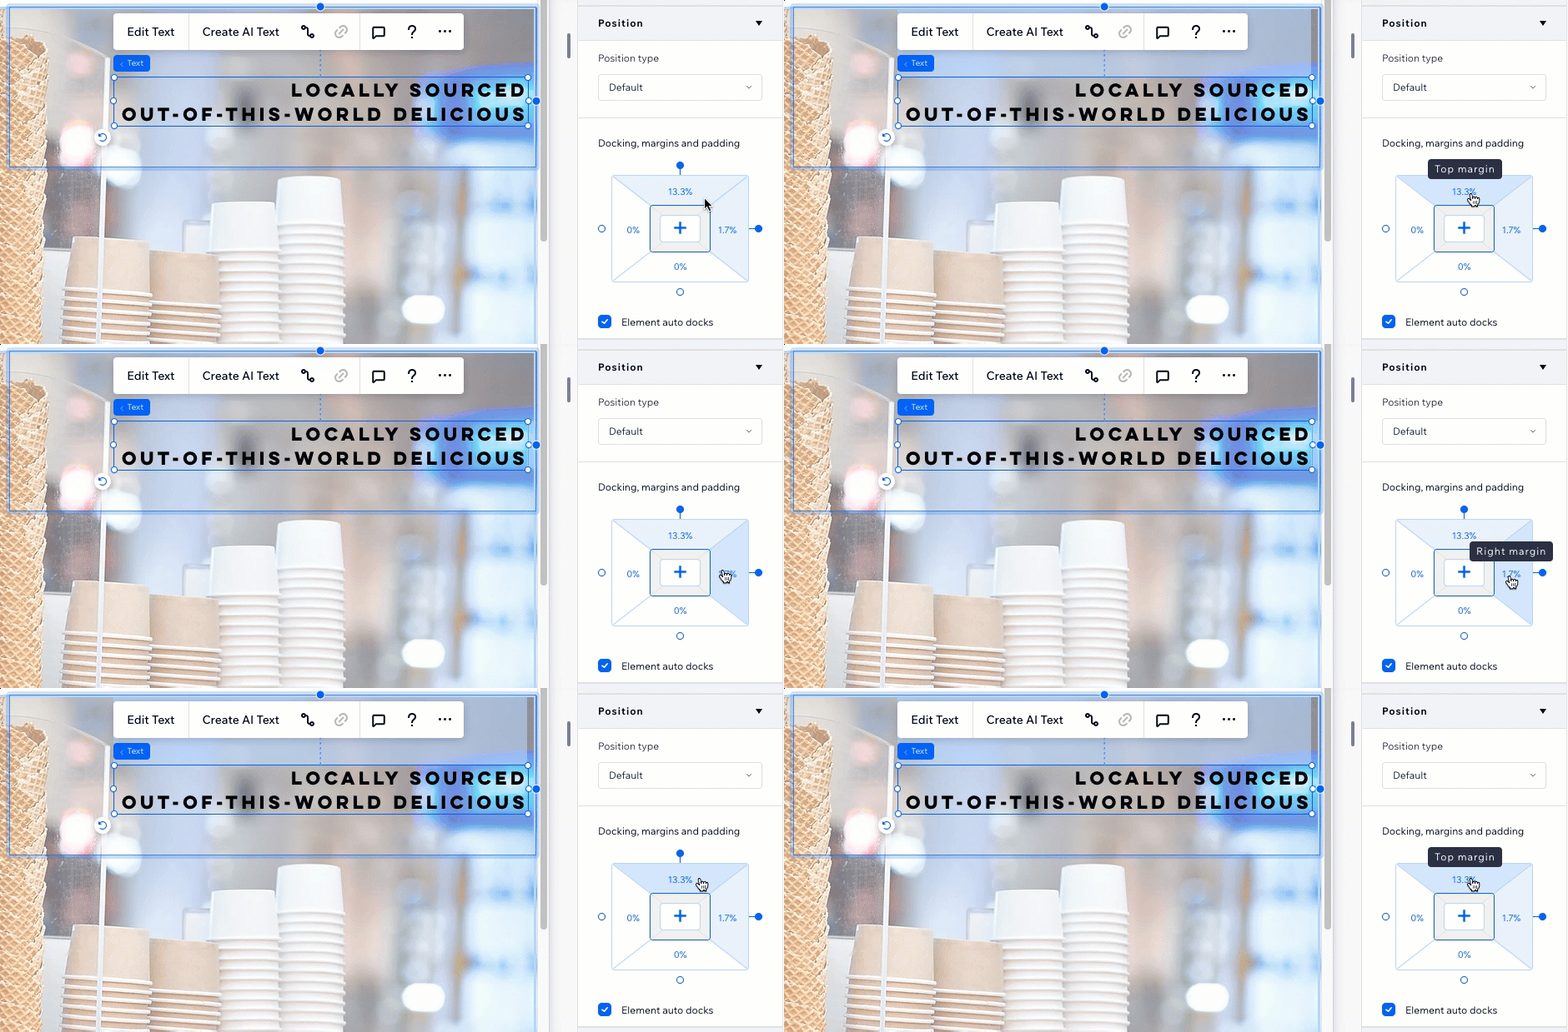
In the example below, the text element is docked to the top and right sides of the cell. Hovering over the margins in the Inspector panel highlights them on the canvas:
To create or edit a margin:
Select the relevant element.
Click the Open Inspector icon
at the top right of the editor.

Scroll down to Position.
Click a margin (e.g. top, left) under Docking, margins and padding.
(Optional) Click the Edit individually icon
 to only edit the side you selected.
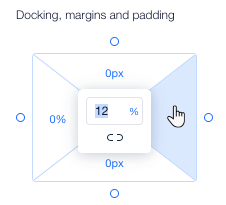
Enter a value for the margin.
Tip: Click the measurement (e.g. px*, %) to change it.
Margin units:
Margins can be set in px*, pixels (px), percentage (%), viewport height (vh) and viewport width (vw). Each unit has a different outcome when the screen is resized. See the difference in the behavior of the units by dragging your canvas to resize it.
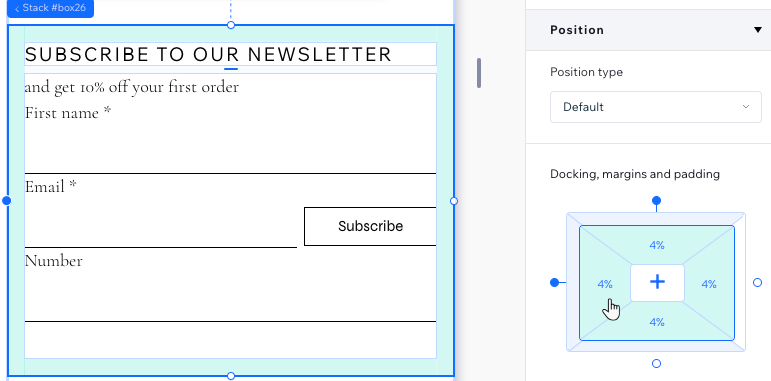
Adding padding around responsive containers
Add padding to containers to create a space between the edges (top, bottom or sides) and the content inside. Padding can be added to all types of responsive containers, including basic containers, stacks, flexboxes, repeaters, cells, sections and pages.
To add padding:
Select the relevant element.
Click the Open Inspector icon
at the top right of the editor.
Scroll down to Position.
Depending on the type of responsive container, follow the steps to add padding:
Page, section or cell
Click the side you want to adjust under Docking, margins and padding.

Enter a value in %, px, px*, vh or vw.
Tip: Click the current size unit to select a different one.(Optional) Click the Apply to all sides icon
 .
.
Other containers
Click the Padding box under Docking, margins and padding.

Click the side you want to adjust.
Enter a value in %, px, px*, vh or vw.
Tip: Click the current size unit to select a different one.(Optional) Click the Apply to all sides icon
.
What's next?
You can adjust the padding directly on the canvas using drag and drop. Select the responsive container and hover over the padding to see this option.

Preventing elements from overlapping
When positioning elements, it's important to make sure they don't overlap on smaller breakpoints. To prevent this from happening, check out our tips below.
Docking to the top
It's usually a good idea to dock your elements to the top of the container, section or grid cell that they are in. This ensures that there is always a defined space between the element and the container/section when more content is added to your page.

Adding cells to organize the layout
For more complex layouts, add cells to organize the section. Place elements inside their own cells and dock them to a grid line so they're positioned perfectly on every screen size.

Applying a stack
Putting a group of elements in a horizontal or vertical stack ensures they don't overlap. A stack is a flex container that automatically adjusts to different screen sizes - you just need to set the margins between elements.

Tip:
Using negative margins, you can make elements overlap in a stack. This lets you place elements in front of others, creating a more intricate design.
If you're currently seeing unwanted overlaps between elements, watch this video tutorial to troubleshoot the issue.