


Dropshipping with Wix Stores
Wix Stores: Creating Print on Demand (POD) Products
Create personalized print on demand (POD) products directly from your Wix dashboard. With Printful as our POD partner, you can choose from thousands of options and add your own branding or design.
When customers purchase a POD product from your store, Printful ships it directly to them.
Creating POD products
You can add products that are suggested for you or search the extensive catalog to find the perfect items for your business. All products come with default pricing, shipping, and more already set up.
After you select a product, make sure to customize it by adding your own images or text.
Tip:
Some products have variants. You may want to design those separately. For example, you can add white text to a black t-shirt variant and black text to a white t-shirt variant.
To create a POD product:
Go to Find Product to Sell in your site's dashboard.
Click to view the product you want to add.
Click Start Designing.
(Optional) In the Product tab, select which option(s) you want to design.
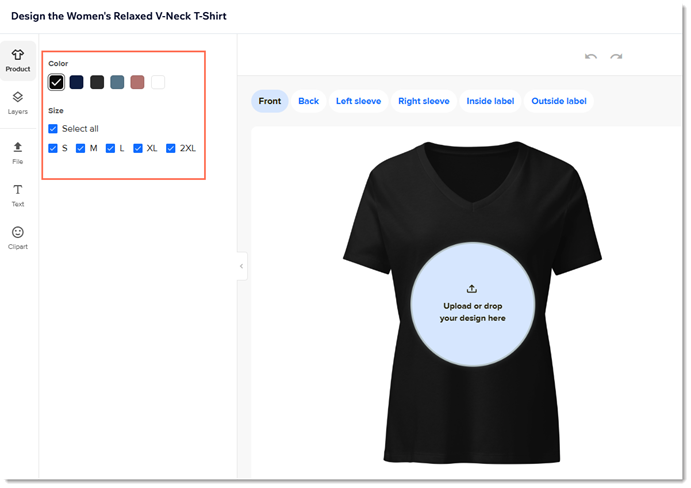
Add personalized content:
Add images:Click File on the left.
Click Add Image.
Tip: Images can be PNG or JPEG. Images should be 300 dpi or more.
Upload an image.
Use the settings to customize, resize, and position the image.
Add text:Click Text on the left.
Enter your text or select a preset.
Click the text if not already selected and use the settings to edit.
Add clipart:Click Clipart on the left.
Select a clipart image.
Use the settings to resize and reposition the image.
When you're ready, click Continue.
Select one mockup style on the top left.
Tip: The images available with this style are displayed on the right.(Optional) Click the star on any image to make it your main product image.
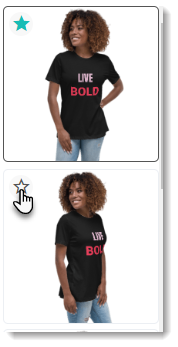
(Optional) Deselect the checkboxes next to mockup angles you don’t want to display.
Click Continue.
(Optional) Adjust the default pricing and click Continue. Learn more
(Optional) Customize the product name and description.
Click Continue to add the product to your store.
Tip: The product is hidden by default. When you're ready, go to your product list and unhide it so it appears on your site.
FAQs
Click a question below to learn more about print on demand products.
Can I order a sample product?
Yes. After designing your product, you can place a sample order to see how it looks. Go to the Printful dashboard to get started.
Learn how to order a sample product from Printful.
How do I fulfill print on demand products?
Once you pay the supplier, they deliver the print on demand products directly to your customers. Make sure you set up a payment method for suppliers. Learn more about paying for and fulfilling Printful products.
What are the recommended image sizes and file types?
You can upload images in PNG or JPEG formats. The recommended image resolution is 300 dpi or higher.
Can I sell a POD product as is - without adding my design?
No, you must add a personal design to each product.
What is Printful's return policy for POD orders?
You have 30 days to submit claims for returns. Learn more about Printful's return policy.