


Promoting stores sales
Wix Stores: Creating Popular Store Discounts
With Wix Stores, you can offer your customers a wide variety of coupons and discounts. This article will focus on how to create those discounts that store owners and customers like best.
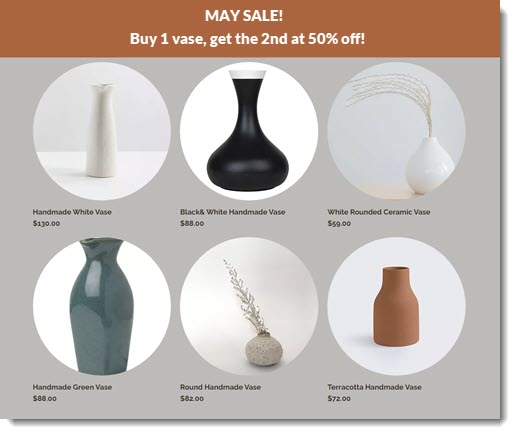
For clarity, this article presents specific options (e.g. buy 2, get 20% off instead of buy X, get X% off). You can, however, adjust amounts and percentages to suit your needs.
In this article, learn how to create the following discounts:
Create a buy 2, get 20% off discount
Offer customers who buy a specific number of products a percentage discount (e.g. Buy at least 2 shirts and get 20% off each one).
Note:
Only items from the relevant category, in this example, shirts, are sold at 20% off - not other store products.
To create the discount:
Go to Automatic Discounts in your site's dashboard.
Click Create Discount.
Enter a discount name.
Select Specific categories under What does this discount apply to?.
Select the relevant category (eg. Shirts).
Select the Minimum quantity of items checkbox and enter 2 as the minimum quantity.
Select Percentage off under What is the discount? and enter 20%.
Complete the discount and click Save.
Offer 25% off entire store/category
Create a store-wide sale by offering a percentage off all your products. Alternatively, you can offer a percentage off a single category (e.g. 25% off all shirts).
To create the discount:
Select how you want to create your discount:
Using automatic discounts:Go to Automatic Discounts in your site's dashboard.
Click Create Discount.
Enter a discount name.
Select what you want the discount to apply to (e.g. All products or Specific categories).
If you chose Specific categories, select the relevant category (eg. Shirts).
Set 25% off as the discount
Using coupons:Click +New Coupon.
Select % Discount.
Enter the Coupon code & Coupon name.
Enter 25% under Discount.
Select All products or Specific category under Apply to.
If you chose Specific category, select the relevant category (eg. Shirts).
Click Create Coupon.
Offer free shipping on orders over $50
Encourage customers to spend a little more so they're eligible for free shipping. You can do so by editing any existing "Flat Rate", "Rate by Weight", or "Rate by Product" rules. Alternatively, if you want this as a temporary offer, you can create a free shipping coupon.
To create the discount:
Select how you want to create your discount:
Using a shipping rule:
Note: You'll need to set this up for every relevant shipping region.
Do one of the following:Set up a Flat Rate shipping rule.
Set up a Rate by Weight shipping rule.
Set up a Rate by Product shipping rule.
Select the Offer free shipping when a customer buys over a certain amount checkbox.
Enter the price over which shipping is free.
Click Save.
Using coupons:Click +New Coupon.
Select Free Shipping.
Enter the Coupon code & Coupon name.
Select Minimum order subtotal under Apply to.
Enter $50
Click Create Coupon.
Create a series of quantity based discounts
You can create a series of discounts that apply when your customer buys certain amounts. For example, offer your customers the following options:
Buy 3 shirts for $180
Buy 4 shirts $200
Buy 5 shirts for $225
Note:
There’s no maximum limitation. Taking the example above, this means that a customer who buys 6 shirts is charged $45 for the sixth shirt, just as they are for the first 5.
To create the discount:
Go to Automatic Discounts in your site's dashboard.
Create the first discount (buy 3 shirts for $180).Click Create Discount.
Enter a discount name.
Select Specific categories under What does this discount apply to?.
Select the relevant category (eg. Shirts).
Select the Minimum quantity of items checkbox and enter 3.
Select Sale price under What is the discount?.
Enter $60 off as the sale price.
Tip: Each shirt sells for $60 if the customer purchases 3 shirts.
Repeat step 2 to create a second automatic discount.
Note: Enter 4 as a minimum quantity and $50 as the sale price.Repeat step 2 to create a third automatic discount.
Note: Enter 5 as a minimum quantity and $45 as the sale price.
FAQs
Click a question below to learn more about creating store discounts.
Can I create a “Buy $200 worth of items, pay only $150” type discount?
It's not currently possible to create this kind of discount. You can vote for this feature and receive an update if it becomes possible.
As a workaround, you can create an automatic discount for 25% off every item in the cart, with a minimum order subtotal requirement of $200.
Can I create a “Buy $200 worth of items, get $20 off the entire cart” type discount?
It's not currently possible to create this kind of discount. You can vote for this feature and receive an update if it becomes possible.
As a workaround, you can create an automatic discount for $5 off every item in the cart, with a minimum order subtotal requirement of $200.
How can I let customers know about the discounts I've created?
Wix offers a variety of ways you can advertise your discounts. Learn about some of the ways you can inform customers about your offers.
What is the difference between creating the same discount with automatic discounts vs. coupons?
When a discount is offered with coupons, your customer needs to enter a code to receive the discount. They can enter the code in the Cart Page (in the image below) or in the Checkout Page.
