top of page

Managing the Members Area

Wix Stores: Creating Exclusive Store Pages for Site Members

Reward your site members by offering exclusive deals just for them. You can allow access to all site members or only to those who know the page's password.

Screenshot of a sample email marketing campaign in Wix

Step 1 | Add a Members Area to your site

The Wix Members Area allows customers to sign up and log in to your site.

Having a Members Area means customers can view past purchases, access information about present orders, save their details for a faster checkout next time, and more.

When you add Wix Stores to your site, it comes with a Members Area. If you deleted it, you can re-add the Members Area.

Step 2 | Add a private page to your site

When site visitors click to access a private page that's restricted to site members, they are prompted to sign up and log in. If you restricted the page to password holders, they are prompted to enter the password.
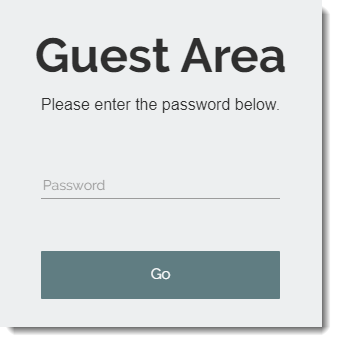
Screenshot of the login window for an private page in a Wix site

Learn how to add a private page to your site.

Step 3 | Add products to the new page

Now add a store element, such as a Product Gallery or Slider Gallery to the new page and create a special category with the products you want to display there.

Tip:

If you want to sell the same products you sell on public pages - but at different prices - you can duplicate your existing products and save them with a different name and price. When the products are ready, add them to a category and display that category on you exclusive page.

Step 4 | (Optional) Hide the page from your site menu

If you don't want site visitors to see that there is a page they can't access, you can hide it from your site menu.

Learn how to hide pages from your site menu in the Wix Editor and in the Studio Editor.

After creating restricted pages, you can:

Need A Professional Website?
Contact Us 
Today!

Google Workspace Error Message: "Your subscription has been suspended by your reseller"

Google Workspace Error Message: Service Is Temporarily Suspended until Your Customer Accepts the New Terms of Service

Google Workspace Error Message: "You already have a Google Workspace business email account. You can manage it from the Google Admin Console"

Google Workspace: Data Migration from an External Email to Your Google Workspace

Google Workspace: Revoking Admin Status to Delete a Workspace Account

Google Workspace: Connecting Your Business Email to a Mail Client Using IMAP and SMTP

Google Workspace: Changing the Language of Your Business Email

Google Workspace: Emails Missing from Your Business Email

Google Workspace: Allowing Access for ‘Less Secure Apps’ in Your Business Email

Google Workspace: Adding Google Workspace MX Records to Your Wix Account

Google Workspace: Setting Up a Domain Alias

Google Workspace: Manually Verifying Your Domain with Google

Google Workspace: Connecting a Business Email for a Domain Pointing to Wix

Google Workspace: Setting Up an Email Alias for an Existing Workspace User Email Address

Google Workspace: Resetting a Workspace User's Password

Google Workspace: Renaming a Workspace User

Google Workspace: Accessing Your Additional Workspace Users

Google Workspace: Purchasing Additional Business Emails from Wix

Google Workspace: Setting Up Business Email Users

Gemini for Google Workspace: An Overview

Google Workspace: Upgrading a Workspace Plan

Google Workspace: Choosing a Plan

Google Workspace: Business Email Sending Limits

Google Workspace: Forwarding Emails From Your Business Email to Another Email Address

Google Workspace: Resetting Your Admin Password

Google Workspace: Accessing Your Admin Console

Google Workspace: Identifying Your Admin Workspace User

Google Workspace: Setting Up Your Business Email on Mobile Devices

Google Workspace: Username and Password Guidelines

Google Workspace: Accessing your Business Email Through Your Wix Account

wix experts
Graphic2Traffic web design
©
bottom of page