


Managing products and categories
Wix Stores: Changing the Visibility of a Product
Hide any products that you want to temporarily remove from your site, but do not want to delete permanently
In this article, learn how to:
Showing or hiding a product
If there's a product you don't want to display on your site, you can hide it at any time (up to 10,000 products). When you're ready, you can display it again.
To set a product's visibility:
Go to Store Products in your site's dashboard.
Hover over the product you want to hide and click the Hide icon
 .
.

Notes:
To turn the visibility back on, hover over the relevant product and click the Show icon
 .
.You can set visibility separately for your online store and point of sale. Click to select a product, then deselect the checkbox next to the relevant option on the right.
Managing SEO for hidden products
When you hide a product, Google crawls its URL and gets to a 404 (i.e. page not found) error, which may hurt the product's ranking in Google. If you'll want to display your hidden products later on, consider using one of the following workarounds to help maintain the product's SEO ranking.
Blog post: Create a category for a group of products (e.g. a category with Valentine's Day products), set each of the products as out of stock, and then display them in a relevant blog post about Valentine's Day.
Footer: Create a category for a group of products, set each of the products to out of stock, and link to that category in your site's footer menu.
Showing or hiding multiple products at once
You can change the visibility of multiple products in your online store at once.
To set the visibility of multiple products:
Go to Store Products in your site's dashboard.
Select the checkboxes next to the relevant products.
Click Set Visibility.
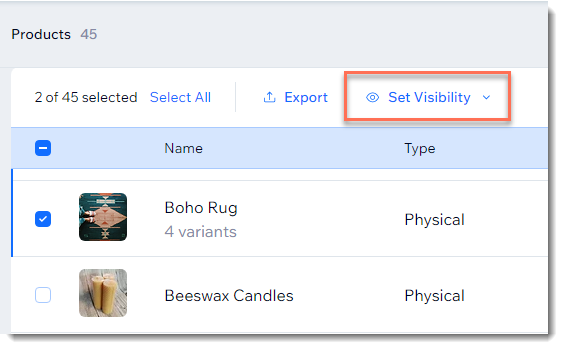
Select a visibility option:Show in online store
Hide in online store
Note:
Learn how to set visibility at a retail point of sale.
Scheduling when products or categories are visible
Important:
The Wix Schedular app is no longer available in the Wix App Market. You can still use it if you already added it.
Set a time when a product or entire category becomes visible or is removed from your storefront. This can help you manage when seasonal items are available.
For example, you can add Valentine's Day products to your store months in advance, but set them to become visible on Feb. 1. Then, you can schedule them all to be removed from your site on February 15th.
Before you begin:
If you want to show and hide a group of products, and they don't all belong to the same category, you can add those products to a new category just for the purposes of managing visibility.
To schedule visibility of products or categories:
Access the app:Go to the Manage Apps tab in your site's dashboard.
Click Open next to Store Scheduler.
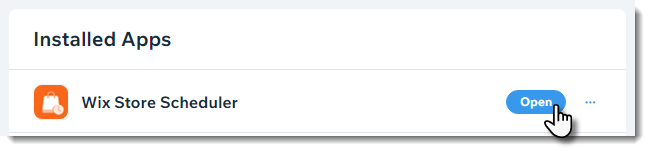
Choose what you want to do next:
Schedule when products become hidden
Click +Schedule Activity.
Select Set Visibility.
Select what you want to hide: A Product or Category.
Select the relevant product or category.
Select Hide
Select a date, time, and time zone.
Click Schedule.
After scheduling when products become hidden, you can schedule when they become visible again.
Schedule when products become visible
Click +Schedule Activity.
Select Set Visibility.
Select what you want to show: A Product or Category.
Select the relevant product or category.
Select Show.
Select a date, time, and time zone.
Click Schedule.
Showing or hiding products option variants
If you added product options to a product, you can change the visibility of each variant separately.
To set visibility of product options:
Go to Store Products in your site's dashboard.
Select the product with options.
Do one of the following:
If the Manage pricing and inventory toggle is disabled:Enable the toggle.
Click the Hide icon next to the option choice you want to hide.
Click Apply.
If the Manage pricing and inventory toggle is already enabled:Scroll down to the Manage Variants section.
Click Edit.
Click the Hide icon next to the variant you want to hide.
Click Apply.
Tip:
Click the Show icon  to turn the visibility back on.
Hiding products from site search results
If you added a search box to your site, by default, the search results include all the relevant store products.