


Designing your store
Wix Stores: Adding and Setting Up the Product Widget
The Product Widget allows you to display a single product anywhere on your site. You decide what happens when clicked; the Product Page can open or the product can be added to the cart.
Note:
The Product Widget is not currently available in Wix Studio editor. You can, however, feature products in other ways, for example with a landing page. Learn more about featuring products.
Step 1 | Add a Product Widget
The Product Widget comes in two styles - a compact style and an expanded style. Choose the style that best suits your needs.
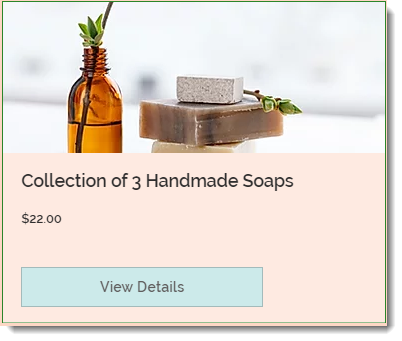
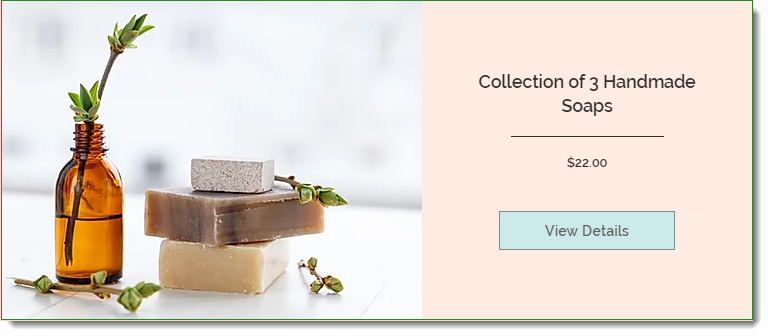
To add a product widget:
Go to the page to which you want to add the Product Widget.
Click Add
 on the left side of the Editor.
Click Store.
Click Product Widget.
Drag the Product Widget onto your page.
Step 2 | Connect the widget to a product
The Product Widget allows you to showcase one of your products and makes it easy to purchase. To set it up, choose the product you want to promote.

To connect a product to the widget:
Click the Product Widget on your page in the Editor.
Click Settings.
Click the Arrow icon
 .
.

Select a product.
Step 3 | Set the widget behavior
Now you can choose whether you want to display a button in the widget. If you display it, you can choose where your customer is directed when they click it - to the Product Page or to the Quick View pop-up.
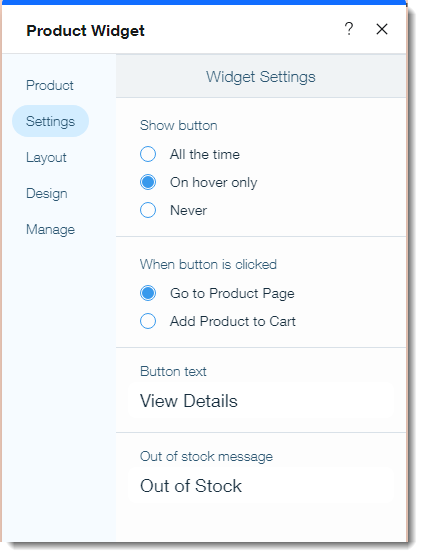
To set the widget behavior:
Click the Product Widget on your page in the Editor.
Click Settings.
Click the Settings tab.
Choose when to display the widget button:All the time: The button is always visible.
On hover only: The button is visible when a mouse hovers over it (the button does not appear on mobile devices).
Never: No button is displayed.
Choose what happens when the button is clicked:Go to Product Page: Customers are directed to the Product Page of the product.
Add Product to Cart: Customers are directed to the product's Quick View where they can add the product to the cart.
Edit the default button text.
Edit the "Out of Stock" message that appears automatically when inventory is zero.
Step 4 | Customize the widget layout
Each of the two Product Widget styles has a variety of layout options. Click the Layout tab to choose and customize the layout.
To customize the layout:
Click the Product Widget on your page in the Editor.
Click Settings.
Click the Layout tab.
Choose the style you want to customize:
Customize the compact style layout

Select a layout.
Select the checkboxes next to what you want to appear in the widget.
Align the text and button left, right, or center.
Set how images are resized:Crop: The image is cut to fit the available space.
Fit: The available space changes to fit the full image.
Set the spacing between parts of the Product Widget.Height: Change the spacing between the product name and price.
Top & bottom padding (px): Change the padding around the bottom section.
Side padding (0% - 100%): Move the text and button farther or closer to the side.
Button offset (px): Change the space between the button and price (not available with all layouts).
Customize the expanded style layout

Select a layout.
Enable the Stretch to full width toggle to make widget span the width of your browser.
Select the checkboxes next to what you want to appear in the widget.
Align the text and button left, right, or center.
Align the image left or right.
Drag the slider to set the image width.
Set how images are resized:Crop: The image is cut to fit the available space.
Fit: The available space changes to fit the full image.
Set the spacing between parts of the Product Widget.Height: Change the spacing between the product name and price.
Side padding (0% - 100%): Move the text and button farther or closer to the side.
Button offset (px): Change the space between the button and price (not available with all layouts).
Step 5 | Design the widget
Select the perfect colors, borders, fonts and more for your product widget.
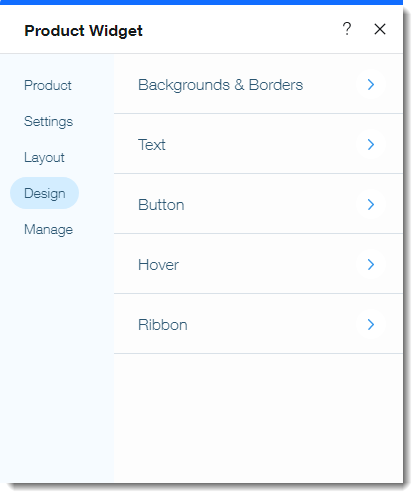
To update the widget design:
Click the Product Widget on your page in the Editor.
Click Settings.
Click the Design tab.
Update the design using any of the available options.
Tell me more about the design options
Backgrounds & Borders: Choose a color for the background and border of your widget to make it stand out on your site. On some layouts you can also customize the length and width of the divider under the text on the widget.
Text: Select a color and font for the text on the widget. Make sure your customers can read the text clearly.
Button: Customize the widget button style, colors, size and text to encourage your customers to click to access the product details.
Hover: Decide how the Product Widget changes when customers move a mouse over it:Nothing: The widget does not change.
Overlay: A color overlay appears on hover.
Zoom: Customers can zoom in on your product.
Border: A border appears around product info.
Ribbon: Customize how product ribbons appear on your widget. You can change the color of the ribbon and text.