


Managing Retail POS staff and reports
Wix Retail POS: Managing Your Customer List
Important:
This article is about Wix Retail POS tablet for brick & mortar businesses.
For info on using POS on a mobile device, click here.
Keep track of customer details so you have a record of all the orders connected to their name. The next time the same customer is checking out, you can quickly add them to the sale by selecting their name from the list.
Tip:
When booking a Wix Bookings session, you must enter a customer name to complete checkout. For store only orders, adding a customer name is optional.
Adding a new customer
You can add a customer to your customer list at any time.
To add a customer:
Open the POS tablet.
Tap Customers on the bottom bar.
Tap + New Customer on the left.
Enter the customer's name and email address.
(Optional) Add additional information:Tap Add More Info.
Enter the customer's phone number, address, or company.
Tap Save.
Viewing a customer's sales history
If you added a customer's name to a sale during checkout (or added it to the sale later), you'll have a record of every order that customer made.
Tip:
The customer information includes actions taken on your website.
To view the sales history:
Open the POS tablet.
Tap Customers on the bottom bar.
Select the relevant customer.
Select what you want to view:Overview: View the total spent, the number of purchases, and review notes.
Bookings: View sessions booked and check their status.
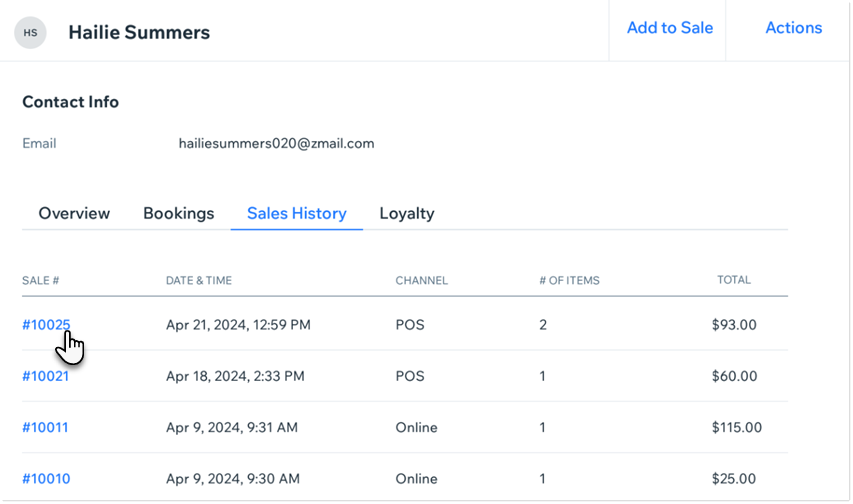
Orders: Click Sales History to view the customer's orders made online or at your POS. You can click a specific order to see more details.
Tip: An order can include store products or sessions booking through Wix Bookings.
Loyalty: Check your customer's point balance and see how many points were redeemed.
Tap a sale in the Sales History tab to view additional details.
Tip:
After selecting a sale, you can tap Actions to print or email a receipt, issue a refund, or exchange products.
Adding a note
Serve your customers better by adding notes to customer records. These notes are internal and won't be viewed by the customer.
To add a note:
Open the POS tablet.
Tap Customers from the bottom bar.
Select the relevant customer.
Tap Actions.
Tap Add a note.
Enter the note and tap Save.
Remove a customer
Keep your records up to date by removing customer details that are no longer relevant.
To remove a customer:
Open the POS tablet.
Tap Customers on the bottom bar.
Select the relevant customer.
Tap Edit.
Tap Delete.
Tap Delete to confirm.
Tips:
Site contacts on your desktop site are automatically added to your customer list.
You can create new customer listings during checkout by tapping Select Customer in the cart and then +New Customer.
