top of page

Managing your Store in Retail POS

Wix Retail POS: Creating Product Categories

Important:

  • This article is about Wix Retail POS tablet for brick & mortar businesses.

  • For info on using POS on a mobile device, click here.

Using product categories, you can organize your store products to help you locate them more quickly at your point of sale.

Note:

Product categories were previously called product collections.

All your products are automatically added to the "All Products" category. You can also add products to other categories so that they appear in more than one category. For example, if you have a pet shop, you can create a "Dog" category and a "Cat" category, that contain dog and cat food respectively. You can also create a general "Pet Food" category that includes the same products that are in the other categories.
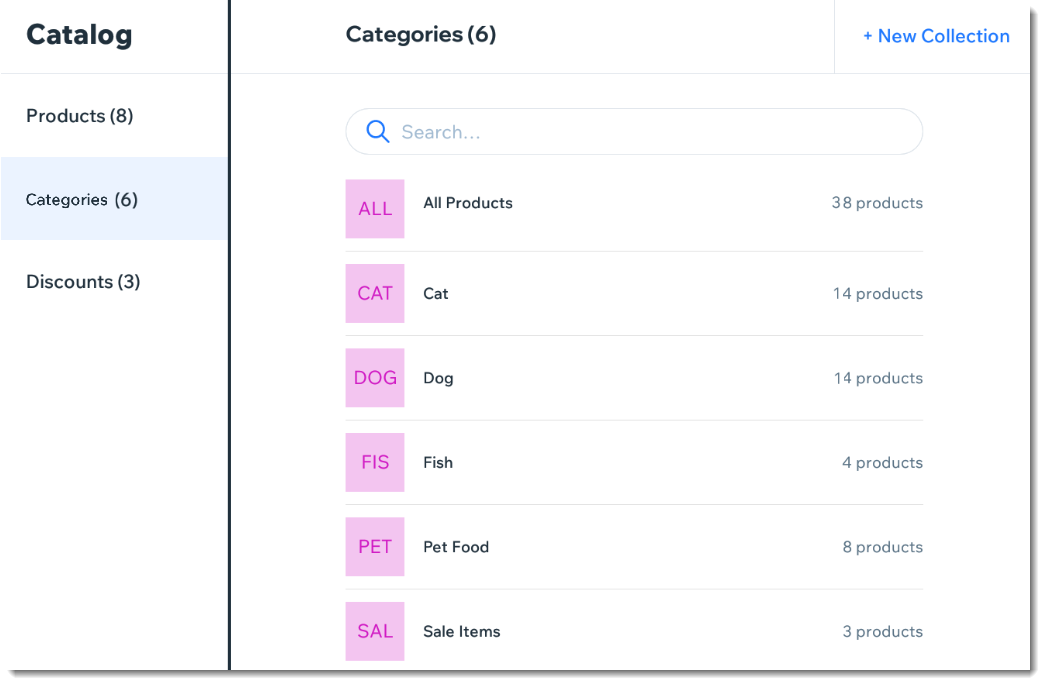
Screenshot of the Categories page in the Wix Retail POS tablet

Note:

Any product categories you create on the POS tablet also appear in your dashboard on desktop and vice versa. You can use categories in your live site to display different types of products on different pages.

To create a product category:

  1. Open the POS tablet.

  2. Tap the Menu icon  at the bottom left.

  3. Tap Catalog.

  4. Tap Categories.

  5. Tap + New Category.

  6. Enter a name for your category and tap Save.

  7. Add products to your new category:Tap Add Products.
    Select the checkboxes next to the products you want to add.
    Note: You can use the search bar to find specific products.
    Tap Add.

Notes:

  • To delete a product category, select the category and tap Delete at the top right. Deleting a category does not delete the products.

  • To remove a product from a category, tap the Remove iconnext to the product.

Need A Professional Website?
Contact Us 
Today!

Wix Bookings: Adding and Setting Up the Next Availability Widget

Wix Bookings: Scheduling and Managing Multi-Service Appointments

Service List Title / Image Navigates to Calendar Page Instead of Service Page

Wix Bookings: Adding and Setting Up a Single Service Calendar

Wix Bookings: Customizing Your Weekly Timetable

Wix Bookings: Adding and Setting Up a Weekly Timetable

Wix Bookings: Customizing Your Staff Members Widget

Wix Bookings: Customizing Booking Form Fields

Wix Bookings: Customizing Your Booking Calendar Page

Wix Bookings: Adding and Setting up a Staff Members Widget on Your Site

Wix Bookings: Adding and Setting Up a Daily Agenda on Your Site

Wix Bookings: Adding and Setting Up a Standalone Book Button

Wix Bookings: Customizing Your Service Pages

Wix Bookings: About the "My Bookings" Page

Wix Bookings: Displaying Different Services on Different Pages

Wix Bookings: Displaying a Featured Service on Your Site

Wix Bookings: Hiding Images from the Service List

Wix Bookings: Changing the Contact and Location Info on the Service Page

Wix Bookings: Customizing Your Thank You Page

Wix Bookings: Setting Up Your Service List

Wix Bookings: About Bookings Pages

Wix Bookings: Saving and Charging Clients' Credit Cards

Wix Bookings: Sending Payment Requests to Clients Using Automations

Wix Bookings: Understanding Price Options

Wix Bookings: Making Credit Card Payments for Your Clients

Wix Bookings: Setting Up Tax

Wix Bookings: Sending an Invoice

Wix Bookings: Extending the Duration of a Membership Plan or Package

Memberships, packages & payments

Wix Bookings: Getting Paid Offline or in Person

wix experts
Graphic2Traffic web design
©
bottom of page