


Creating your Wix Restaurants menu
Wix Restaurants: Customizing and Designing Your Menu
Important:
This article is about the original Wix Restaurants Menus App. Try out our new, improved menu app. Learn how to add and set up Wix Restaurants Menus (New) app.
Make your menu as appealing as your food. Your menu is a showcase for the taste and feel of your restaurant. Use the Menu Settings panel to customize the design, layout and information settings of your restaurant menu.
In this article, we'll show you how to:
Choosing what information to show
You decide what info you want to show on your menu. If you prefer not to display your dish prices, that's OK. You can also choose to display only specific menus, such as Breakfast and Dinner, but not Lunch.
To choose what information to show:
Select your restaurant menu in the Editor and click Settings.
Click the Settings tab.
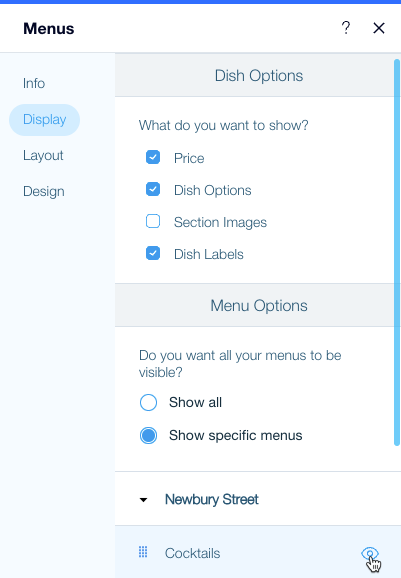
Select or deselect the checkbox next to menu elements to display or hide them:Price: Displays the dish price.
Dish Options: Displays dish options (e.g. sizes), if you created them.
Section Images: Displays an image for each menu section (e.g. Appetizers).
Dish Labels: Displays the label(s) for each dish, if you added them.
Select which menus to display:Show all: Displays all the menus you created.
Show specific menus: Select which menus you want to display.Hide a menu: To hide a menu, hover over it and click the Hide icon.
icon.
Show a menu: To show a menu, hover over it and click the Unhide icon.
icon.
Changing the layout of your menu
Menu layouts give a flavor all of their own. Plan your menu layout to match the style of your restaurant.
To change the layout of your menu:
Select your restaurant menu in the Editor and click Settings.
Click the Layout tab.
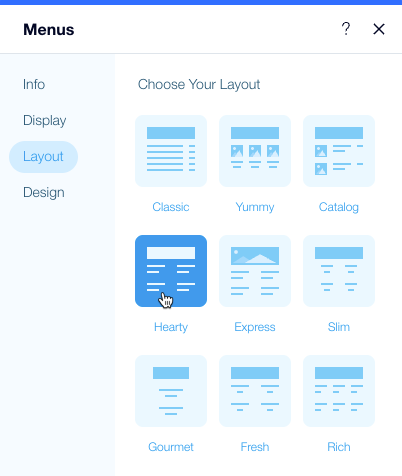
Select a menu layout.
Note:
If you wish to display dish images on your site, make sure to select a layout which includes images, such as Yummy or Catalog.
Customizing the design of your menu
It's said that people "eat with their eyes". Your menu design is the first bite. You can change the colors, fonts and more to make sure your menu looks just as you want it to.
To design your restaurant menu:
Select your restaurant menu in the Editor and click Settings.
Click the Design tab.
Customize the design of the menu:Menu Title: Edit the font and color of the menu name.
Descriptions: Edit the font and color of the menu description.
Menu Separators: Edit the color of menu line separators.
Menu Background: Edit the menu's background color.
Customize the design of the menu sections:Section Title: Edit the font and color of the name of menu sections (e.g. Appetizers)
Section Description: Edit the font and color of the name of menu descriptions.
Customize the design of the dishes:Dish Title: Edit the font and color of the names of your dishes.
Descriptions: Edit the font and color of dish descriptions.
Dish Price: Edit the font and color of dish prices.
Special Dishes: Edit the color of markings on dishes defined as special dishes.
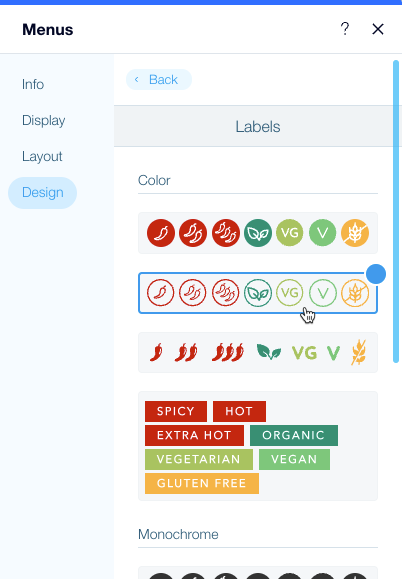
Select your labels design:Choose from one of the preset label designs.
Customize your own label design with the style and color of the label icons.
Note:
Menu titles are visible only when you display more than one menu.