


Managing your guests
Wix Events: Managing Your Guest List
Your guest list is where you can view all the individual guests attending your event. From here, you can see what guests wrote on their registration forms, you can add or remove guests, resend tickets, and more.
If you're hosting an RSVP event, the Guests tab looks like this.
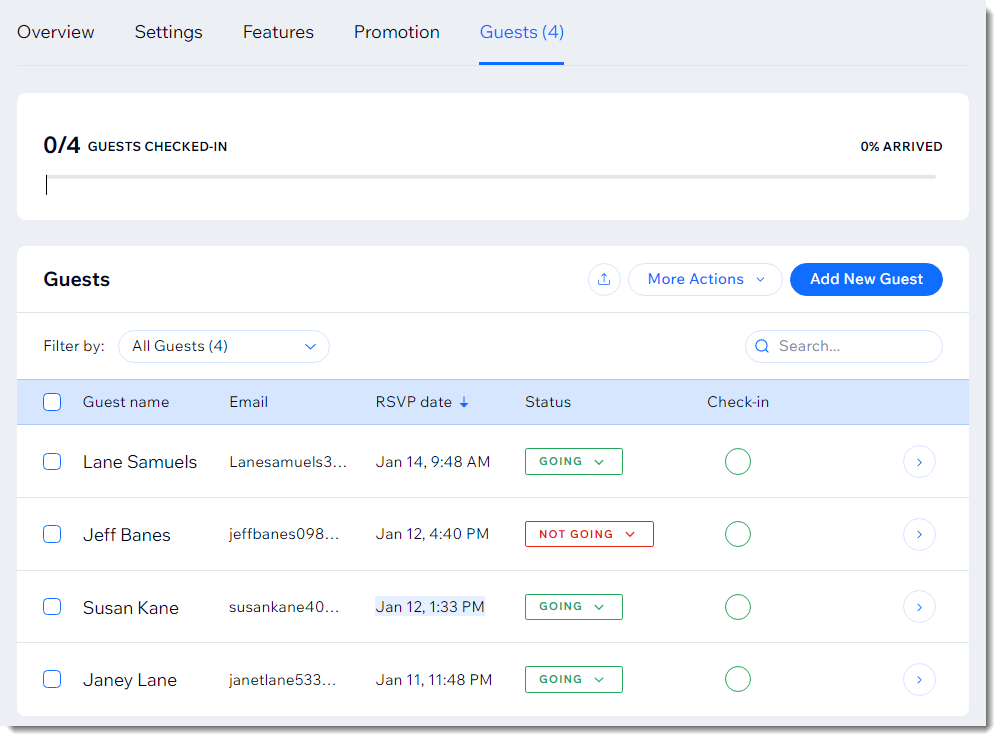
Ticketed events have additional information, such as the ticket price and the seat (if your event has a seating map).

Show me how to access the guest list
Go to Events in your site's dashboard.
Select the relevant event.
Click Guests.

In this article, learn how to:
Editing a guest's information
You can edit a guest's info and contact details, RSVP status, and more.
To edit guest info:
Go to Events in your site's dashboard.
Click the relevant event.
Select the Guests tab at the top.
Click the relevant guest.
Click Edit Guest Details.
Edit the available information.
Click Save.
Viewing responses to registration form questions
When guests register for an event, they fill out your registration form. In the guest list, you can view their responses.
Tip:
To view a table with all your guests responses, you can export the guest list.
To view registration form responses:
Go to Events in your site's dashboard.
Select the event you want to view.
Select the Guests tab at the top.
Click the relevant guest.

Viewing and managing your waitlist
If your RSVP event has a waitlist, you can see who is on it and update the waitlist status.
To manage the waitlist:
Go to Events in your site's dashboard.
Select the event you want to view.
Select the Guests tab at the top.
Click the Filter by drop-down and select Waitlist.

(Optional) Click the Status drop-down next to a guest and update the status.
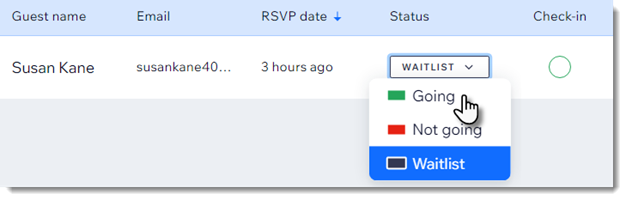
Learn more about creating and managing waitlists.
Resending or downloading tickets
You can resend tickets to your guests by email if they lost their tickets or didn't receive them. You can also download a ticket to your computer.
To resend tickets:
Go to Events in your site's dashboard.
Select the event you want to view.
Select the Guests tab at the top.
Click the relevant guest.
Click More Actions.
Select an option:Resend ticket: Select Resend Ticket and then Resend to confirm.
Note: The ticket is emailed to the email address the guest entered when registering.
Download ticket: The ticket downloads to your computer.
Removing guests from the guest list
You can remove any guests who are not planning to attend your event.
To remove a guest:
Go to Events in your site's dashboard.
Select the event you want to view.
Select the Guests tab at the top.
Click the relevant guest.
Click More Actions.
Click Remove Guest.
Click Remove Guest to confirm.
Tips:
Learn more about removing and refunding an order (for ticketed events)
To view guests you removed, filter the guest list by "Removed".
FAQs
Click a question below to learn more.
How can I check guests in?
You can check in guests one at a time or check in multiple people at once. Learn how to check guests in.
Notes:
The ability to check guests in for RSVP event is not yet available for all users.
You can also add staff members to an event. They can check in guests, scan their tickets and help manage the guest list using the dedicated Check-in by Wix app.
How can I add a guest to the list?
If a guest is attending and they don't register through your site, you can add them yourself. Learn how to manually add a guest to the guest list.
Can I export the guest list?
Yes. You may find it easier to view guests, their details, and responses to registration form questions by viewing the list in a spreadsheet. Learn how to export your guest list.
Can I update the payment status from unpaid to paid in the guest list?
In the guest list, you can only view the payment status. To mark the status as paid, you need to go to the Orders tab.
To mark an order as paid:
Go to Events in your site's dashboard.
Select the event you want to view.
Select the Orders tab at the top.
Click the relevant order.
Click the No Paid drop-down and select Paid.
Note: This cannot be undone.

Can I edit the number or type of ticket a guest purchased?
No, it's not possible to edit ticket information.