Using the Wix app to manage your bookings
Wix Bookings: Viewing Your Upcoming Sessions in the Wix App
View your upcoming sessions directly on the Wix App. This helps you stay organized and manage your schedule on the go. For instance, if you run a yoga studio, you can quickly check your class time or see who has signed up, making it easier to prepare and give the best experience to your clients.
You can add advanced filters to easily find a session based on the staff member, location, service, or other events on your calendar. You can also manage your pending appointments through your booking calendar.
In this article, learn more about:
Viewing the booking calendar in the Wix app
Access your booking calendar in the Wix app to view and manage your sessions. Choose from different views based on your preference, and filter them to quickly find and manage sessions. You can tap any booking to see details like the participant list, time, and date.
To view the booking calendar in the Wix app
Wix app
Wix Studio app
Go to your site in the Wix app.
Tap Manage
 at the bottom.
Tap Booking Calendar.
Tap Calendar.
Tap the Change View icon
 at the top right.
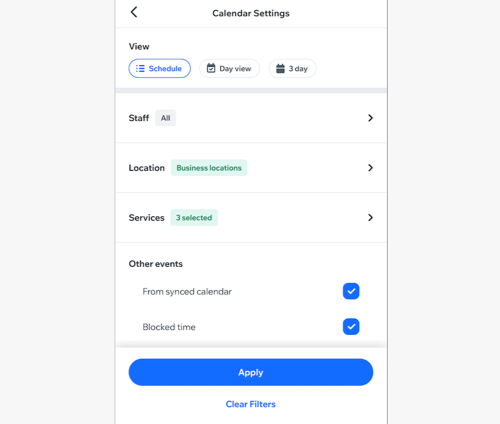
Choose your Calendar Settings:
Calendar view
Tap to select your preferred view:
Schedule: See all upcoming sessions in order, regardless of time in between them (e.g. sessions on Friday and Monday will appear next to each other if your business is closed on weekends). This is a convenient way to book clients in for their next session
Day view: See all upcoming sessions for a specific day, including empty time slots. This is useful for scheduling clients or creating new services.
3 day: View sessions over a 3-day period. This is great for scheduling new bookings, especially during busy periods.
Advanced filters
Tap the filter(s) you want to apply to your calendar:
Note: If you leave the Bookings area, your calendar filters won't be saved.
Staff: Tap the checkbox next to the relevant staff member(s) you want to display, then tap Select.
Location: Tap a location: All locations, Business locations, Custom location, or Client's place, then tap Select.
Note: If you have multiple Business locations, tap the checkbox next to the relevant location(s).Services: If relevant, tap the category and then tap the services you want to filter. Tap Select.
Tip: Tap the All checkbox next to a category to add an entire category.Other events: Tap the checkbox next to the event you want to display: From synced calendar or Blocked time.
7. Tap Apply/Clear Filters.
Viewing and managing pending appointments in your Wix app
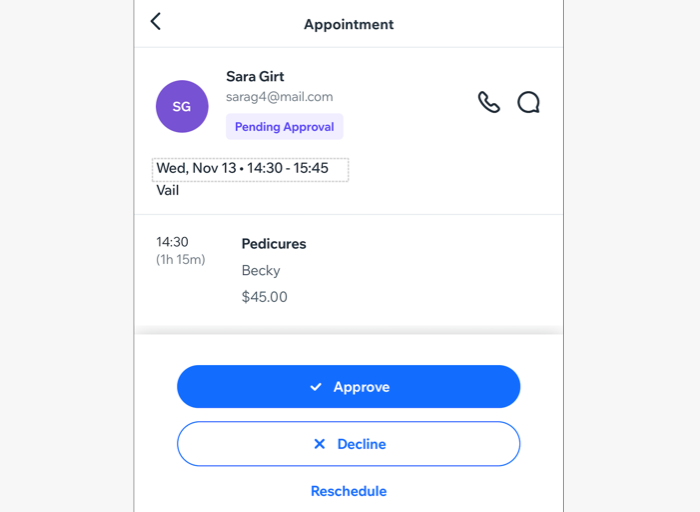
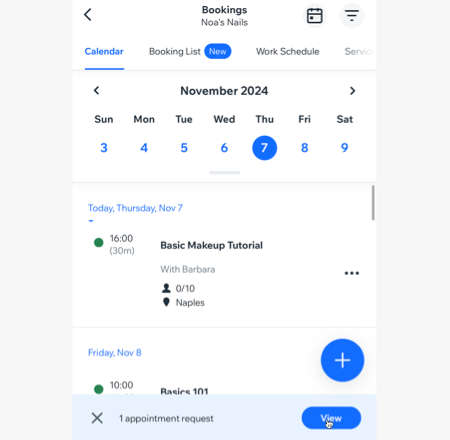
For appointments where you enable manual approval, you can manage booking requests directly in the Wix app. A notification appears at the bottom of your booking calendar when a new request comes in. You can tap this notification to approve, decline, or reschedule the requests.
Wix app
Wix Studio app
Go to your site in the Wix app.
Tap Manage
at the bottom.Tap Booking Calendar.
Tap Calendar.
Tap View on the appointment request notification at the bottom of your screen.
Tap the relevant appointment request.
Choose what you want to do:Approve the appointment: Tap Approve to add the appointment to your calendar.
Decline the appointment: Tap Decline. If you want to send your client an email, tap the Notify client with an email checkbox to select it. Then tap Decline to confirm.
Reschedule the appointment: Tap Reschedule to move the appointment to a different time. Edit the session details and then tap Save.
Tip: Make sure to let your clients know of any schedule changes.