


Using the Wix app to manage your bookings
Wix Bookings: Manually Scheduling Bookings for Clients Using the Wix App
Talking to a client who wants to book a service? From the Wix app, you can easily book appointments for your clients or add them to classes and courses.
In this article, learn more about:
Manually scheduling an appointment for a client
Book clients in for appointments while you're on the go, using the Wix app. This is a great way to offer clients the best experience possible when you meet them in person or are speaking to them over the phone.
To manually book an appointment for a client:
Go to your site in the Wix app.
Tap Manage
 at the bottom.
Tap Booking Calendar.
Tap the Add icon
 .
.Tap Appointment.
Tap to select an existing client or tap + Add New Contact to add a new one.
Select the relevant appointment.
Tap to choose the Date for the appointment.
(Optional) Create a recurring appointment:Tap the Repeats drop-down and choose how often the appointment repeats.
Tap the For drop-down and select the total times the appointment repeats.
Tap Select.
Tap the Location drop-down to choose where the appointment takes place.

Tap the Session starts drop-down to choose the start time.
Tap the Duration drop-down to select how long the session lasts.
Tap the Staff member drop-down to assign a staff member.
Note: A notification will appear if there are scheduling conflicts. You can continue scheduling or tap Show free time slots to choose a different time.Tap the Payment options drop-down to select how your client will pay for the session:Use client's plan now: Redeem the session from the client's membership plan or package as soon as you schedule it.
Use client's plan later: Redeem this session from the client's membership plan or package at a later date (from the Manage Participants section of the booking calendar, or the Orders page).
Note: If your client doesn't have a pricing plan yet, you can tap Sell Plan to choose a plan for them, before continuing to create the appointment. Make sure you get the client's consent before signing them up for one of your pricing plans.
Collect payment: Charge the client for this session or mark as paid at a later date (from the Manage Participants section of the booking calendar or the Orders page).
(Optional) Select the Notify client with an email checkbox to send your client an email with the details.
Tap Book.
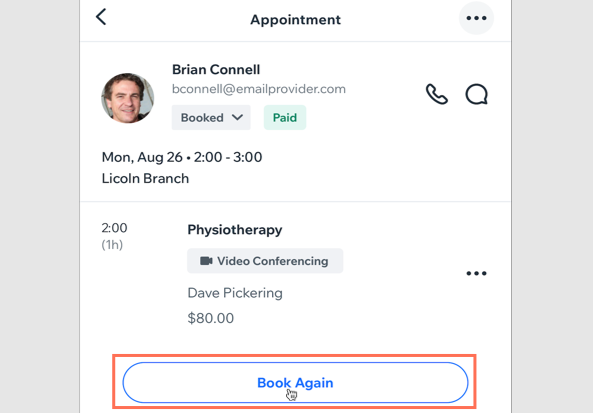
Want to rebook the same client?
Select a past appointment in your booking calendar, tap Book Again, enter the details, and tap Book to confirm the new appointment.
Scheduling a multiservice appointment for a client
You can also schedule multiservice appointments for clients. This is useful when you offer services that complement each other, such as hair, nails and make up treatments.
Important:
Multiservice appointments are not available for recurring sessions.
To schedule a multiservice appointment for a client:
Go to your site in the Wix app.
Tap Manage
at the bottom.Tap Booking Calendar.
Tap the Add icon
.Tap Appointment.
Tap to select an existing client, or tap + Add New Contact to add a new one.
Tap the relevant appointment.
Add the appointment details, including the date, time, duration, location, staff member, etc.
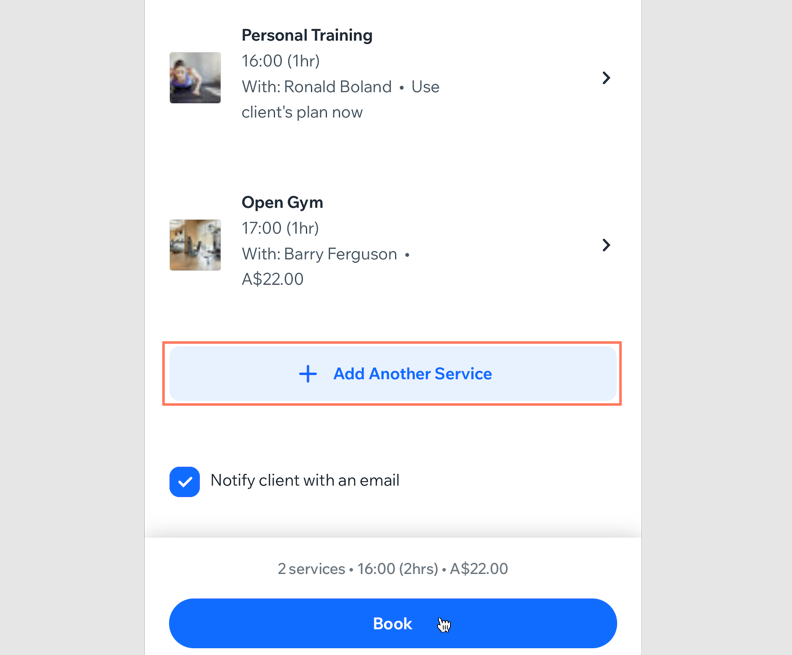
Tap + Add Another Service.
Note: A notification will appear if there are scheduling conflicts. You can continue scheduling or tap Show free time slots to choose a different time.Tap to select the relevant appointment.
Enter the same details as step 8 above.
Tap Continue.
(Optional) Select the Notify client with an email checkbox to send your client an email with the details.
Repeat as necessary and tap Book to go to checkout.
Tap to choose what you want to do:Book without charging: Collect payment from the client later.
Charge with point of sale: Charge your client using the Wix app as a point of sale.
Enter card info manually: Enter your client's credit or debit card details yourself.
Charge with invoice: Send your client an invoice.
Mark as paid: Mark the multiservice appointment as paid. This is useful if the client wants to pay up front with cash.
Want to rebook the same client?
Select a past multi-service appointment in your booking calendar, tap Book Again, enter the details, and tap Book to confirm the new appointment.

Scheduling conflicts when manually scheduling an appointment
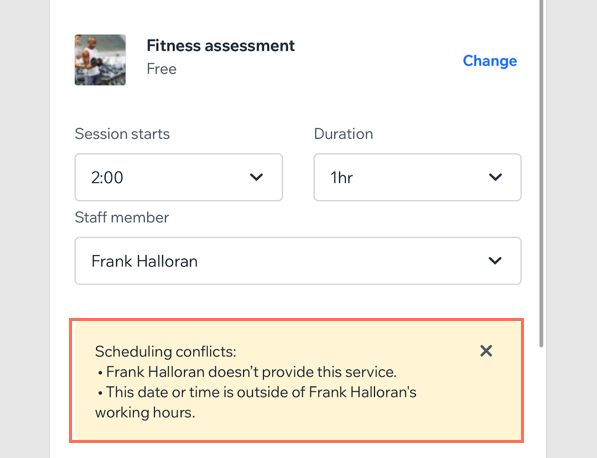
When manually creating an appointment for a client, you may encounter scheduling conflicts. This can happen in a few different ways:
When the staff member is busy
The slot is outside the staff member's working hours
The chosen staff member does not provide the service.
The appointment is plan-only and the client doesn't have any active plans at the moment.
You can still override the conflict and book the service anyway. Make sure to let your staff members know in advance if you choose to do so.
Manually adding a client to a class or course session
Add clients to your classes or courses from your phone, using the Wix app. This works well when meeting clients in person or chatting to them online or over the phone. You can also make group bookings for classes and courses on a client's behalf.
To manually add a client to a class or course session:
Go to your site in the Wix app.
Tap Manage
at the bottom.Tap Booking Calendar.
Tap the relevant class or course session.
Tap Manage Participants.
Tap the Add Participant icon
 at the top right.
Select an existing client, or tap + Add New Contact to add a new client.
(Optional) Make it a group booking by adjusting the number next to Group Of.
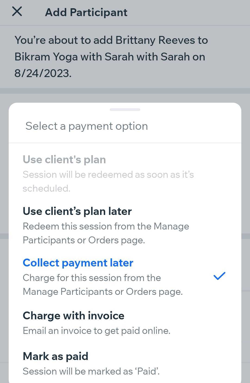
Select a payment method under How will you charge your client?:Use client's plan: Redeem the session from the client's membership plan or package as soon as you schedule it.
Use client's plan later: Redeem this session from the client's membership plan or package at a later date (from the Manage Participants section of the booking calendar, or the Orders page).
Collect payment later: Charge the client for this session at a later date (from the Manage Participants section of the booking calendar or the Orders page).
Charge with invoice: Send your client an invoice.
Mark as paid: Mark the session as 'Paid'. Choose this option if your client pays you in cash or check in person.
Note: You cannot undo this action.
(Optional) Select the Notify participant with email checkbox to send your client an email with the details.
(Optional) Select the Mark as checked in checkbox to mark your client as checked in for the session.
Tap Add Participant.