


Managing your calendar & bookings
Wix Bookings: Adding Internal Notes on the Bookings List App
Important:
This article refers to the previous version of the Bookings List app. Learn more about the latest version of the Booking List.
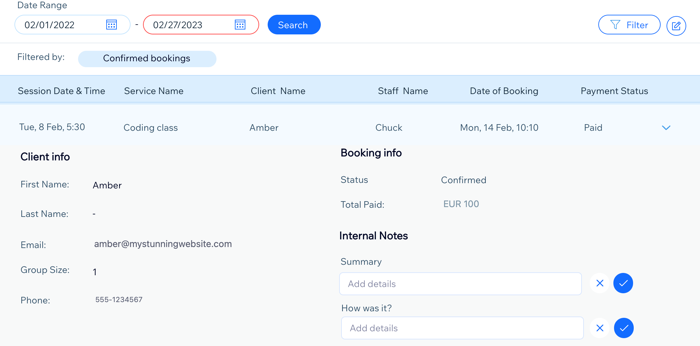
Add internal notes to sessions on the Bookings list app to keep track of important information about your sessions. You can create a total of 5 internal notes, including up to 3 text fields, and 2 checkboxes. They automatically appear for each session in the Bookings List app.
This is helpful when you want to add session summaries, follow-up actions, or any other additional information you may need. These notes are visible only to you, co-owners, or admins with permission to view the Booking List App.
In this article, learn more about:
Important:
The Bookings list app is currently only available in English.
Adding an internal note
You can add 2 types of internal notes: a text field or a checkbox. The notes you create appear on all bookings. For example, add a "Session summary" note to write a short note about the session and a "Follow-up needed" checkbox that you can select or leave unchecked.
Important:
After adding internal notes on the Bookings List app, we recommend that you don't edit the field name title in a way that changes the topic. Saved notes are connected to the field name title, so editing them to different topics may cause confusion.
You can, however, edit a note subject to correct a typo or rephrase it.
To add an internal note:
Go to the Bookings List app, under Booking Calendar, in your site's dashboard.
Click the Internal Notes icon
 at the top right.
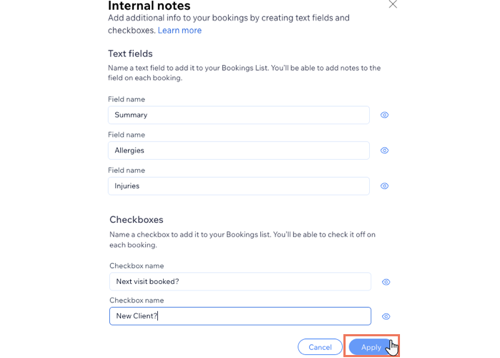
Enter a name for your field or checkbox:
Text field:Select Text Field.
Enter the Field name (e.g. Session summary).
Note: You can add a maximum of 3 text fields internal notes.
Checkbox: Add a checkbox that can be selected.Select Checkbox.
Enter the Checkbox name (e.g. Follow-up needed).
Note: You can add a maximum of 2 checkbox internal notes.
Click Apply.
FAQs
Click a question below to learn more about adding internal notes to sessions in the Booking List app:
How many notes can I create?
You can create a total of 5 internal notes, including up to 3 text fields, and 2 checkboxes.
How do I edit an individual note for a session after I created internal notes?
Click the relevant session in the Bookings List app to expand it.
Click the Edit icon
 next to the note.

Enter the note.
Click the checkmark
 to save.
Can I delete an internal note?
You can only hide internal notes from all sessions in the Bookings List app, but not delete them.
To hide an internal note from all sessions:
Go to the Bookings List app, under Booking Calendar, in your site's dashboard.
Click the Add Internal Notes icon
at the top right.Click the Hide icon
 next to the field you want to remove from all sessions.
Changed your mind?
Click the Hidden icon  to re-add the internal note to all sessions.

Can I add the Internal notes in the Bookings List app to the calendar or contact notes?
No, these notes are just for the Bookings List App. You can, however, add a note to a specific booking in the Booking Calendar or add a note to a client profile.