


Setting up Pricing Plans
Pricing Plans: Automatically Creating Invoices for Purchased Plans
Important:
The article below discusses the Wix subscriptions app Pricing Plans. If you're looking for information about upgrading your site with Wix Premium plans, please check this article.
Send personalized invoices to your clients automatically, every time they purchase a Pricing Plan. This can service your clients as it helps them track their payments for your plans. For recurring orders, Wix Pricing Plans sends an invoice each payment cycle.
In this article, learn more about:
Enabling automatic invoices for your Pricing Plans
Enable the "Send invoices" toggle to automatically send invoices to your customers when they make a purchase. Wix offers a default invoice design that you can personalize to your liking (see section below).
Important:
Invoices do not send when you manually add a client to a plan.
To enable automatic invoices:
Go to Pricing Plans Settings in your site's dashboard.
Scroll down to the Send Invoices section in the Billing tab.
Enable the toggle to automatically send payment confirmation once you've been paid online.
Click Save.

Customizing your automatic invoices
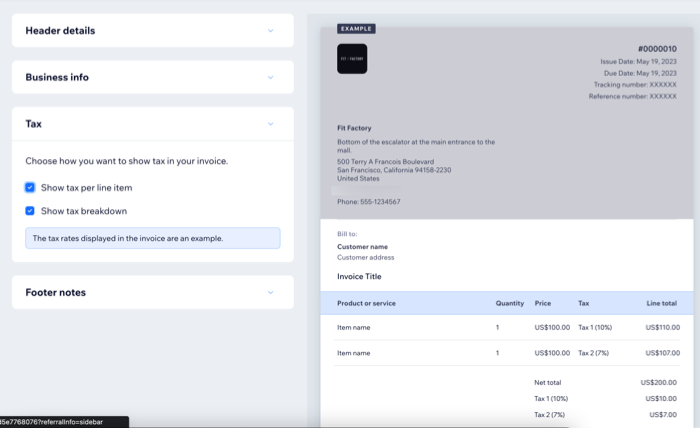
You can customize your invoices by adding your company details and branding. You can edit the header, business info, and default notes you display at the bottom of your invoice. You can also preview the changes you make on the right side of the screen.
To customize your automatic invoice:
Click Customize Invoice.

Click to expand Header details in the Invoices tab.
Select an invoice name or click Add Custom Name to create your own.
Tip: The name appears before the invoice number.(Optional) Click Edit invoice numbering to choose which invoice number to start numbering at:Enter the number invoice numbering should start at.
Click Done.
Note: Once the starting number is set, it can't be changed to a lower number.
Add or edit the business logo:Click Edit Logo.
Click Add Logo / Update Logo.
Select or upload a logo and click Choose File.
Click Save.
Click Back on the banner at the top of the page.
Click the drop-down under Header fields to add one or more preset document details (e.g. Tracking number) or click Create New Field to create your own.
(Optional) Click the second drop-down and choose another header field to add.
Tip: Added details appear under the Issue Date.
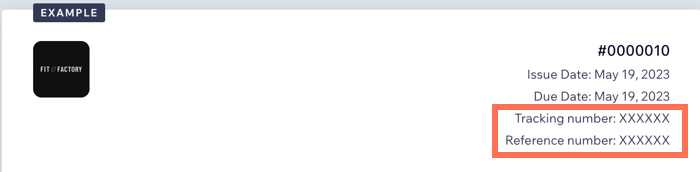
Add or edit your business details:Click to expand Business info.
Click Edit Business Info to add or update your name, address, and email.
Make the necessary changes and click Back at the top of the page.
(Optional) Add more business details:Click +Add Custom Fields.
Select a field from the Field Name drop-down or click Create New Field to create your own.
Enter a value.
Click +Add Another Field to add additional business info.
Click Add.
Click to expand Tax. Then click to select the relevant checkboxes: Show tax per line item and Show tax breakdown.
Click to expand Footer notes:Click Edit next to Notes.
Edit the note title.
Enter the note text.
Click Save.
Add legal terms that appear on all invoices:Click Edit next to Terms.
Edit the title.
Enter the legal term text.
Click Save.
Customize the invoice email:Scroll down to the bottom of the page.
Edit the subject line.
Edit the default email text.
What's next?
To view your invoices, go to the Subscriptions tab in your site's dashboard and then select the relevant invoice.