


Setting up Online Programs
Online Programs: Managing Your Sections and Steps
Once you've added your program content, you can organize it so the sections and steps are clearly defined and easy for participants to follow. Steps are nested beneath sections so you can clearly see the flow of your online programs and make edits.
In this article, learn more about:
Managing your program sections
Once you've created your sections, you can duplicate them, reorder them, and edit the titles and descriptions to make sure everything is clear.
Note:
Sections are only available for self-paced programs.
Dashboard
Wix app
Go to Online Programs in your site's dashboard.
Select the relevant program.
Scroll down to the Content section.
Manage your sections using the following options:
Edit a section:Hover over the section and click Edit.
Edit the relevant details and/or cover image.
Click Save.
Duplicate a section:Hover over the section name and click the More Actions icon .
.
Click Duplicate. The duplicate section appears beneath the original section.
Delete a section:Hover over the section name and click the More Actions icon.
Click Delete.
Click Delete to confirm.
Reorder a section: Click and drag a section to move it up or down on the page.
Add a section: Click + Add section at the bottom of your program content.
Tip:
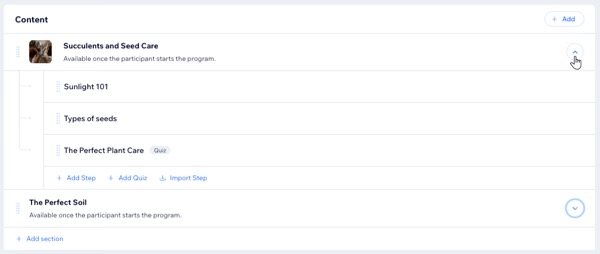
Click the drop-down arrow to the right of a section to expand or collapse the steps within that section.
Managing your program steps
While program sections help keep you and your participants organized, steps are where you provide the crucial information about how to reach the program goal. You can edit, rearrange, or delete steps as needed.
Dashboard
Wix app
Go to Online Programs in your site's dashboard.
Select the relevant program.
Scroll down to the Content / Schedule section.
Click the drop-down arrow next to the section that contains the steps you want to manage.
Manage your steps using the following options:
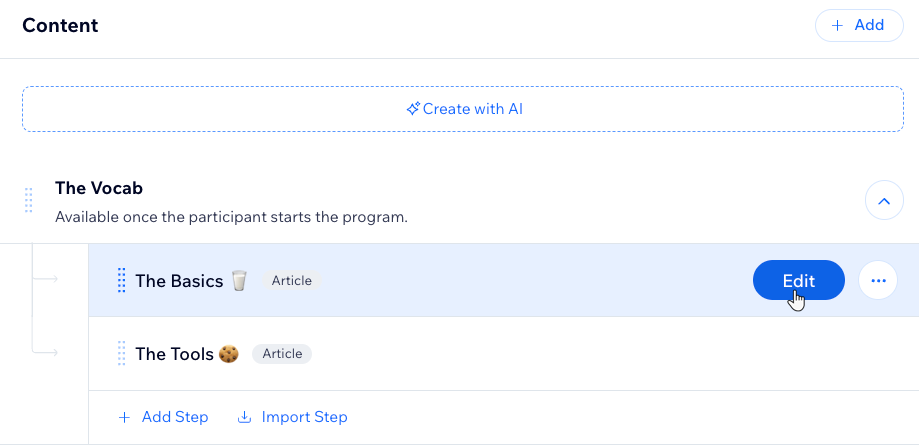
Edit a step:Hover over the step and click Edit.
Edit the step content.
(Optional) Click the Section drop-down and select the relevant section to move the step to a different section.
Click Save.
Duplicate a step:Hover over the step and click the More Actions icon.
Click Duplicate.
Update the relevant information.
Click Save.
Delete a step:Hover over the step and click the More Actions icon.
Click Delete.
Click Delete to confirm.
Reorder a step: Click and drag a step to move it up or down within the section.
Note: Steps can be arranged in any order
Add a step: Click + Add Step at the bottom of the relevant section.
Tip:
Add a quiz or survey to your program to keep participants engaged. You can customize questions to assess content effectiveness.
FAQs
Click a question below to learn more about managing your program's sections and steps.
Can I add steps to published programs with participants?
Yes. You can add steps at any time to a program that is live and has participants.
What happens when I add steps for past or future days in a program?
Creating steps for future days adds them to the program curriculum. However, if you add steps for days that have passed, they will be marked as missed (in red) for participants.
What happens to newly added steps for participants who have completed a program?
Newly added steps won't be visible for those participants who have already finished the program.