


Desktop POS Solutions
Desktop POS Solutions: Selling to Clients Using POS Checkout
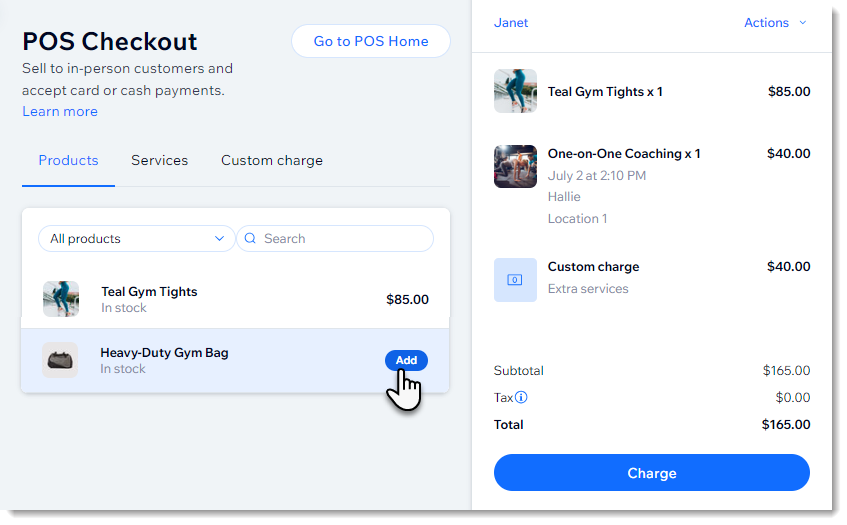
Use POS Checkout to sell in person right on your computer dashboard. You can collect payment for:
Store products
Appointments booked through Wix Bookings
Custom charges
Tip:
After setup, you can accept payment through a card reader or by manually entering credit or debit card details. You can accept cash payment without any setup.
Setting up a card reader
Important:
Accepting payment using a card reader is currently available only for merchants in the US and Canada.
Before you can collect payment in person from clients using a card reader, you need to connect to Wix Payments and purchase the reader.
To set up payment using a card reader:
Wix Dashboard Card Reader works with the Wix Payments payment provider. Start by connecting to Wix Payments.
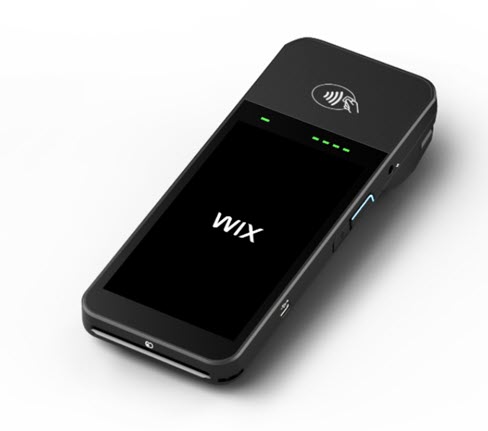
Acquire the BBPOS WisePOS E card reader.
Tip: You can purchase the reader from the Wix POS shop or anywhere they are sold.Enable Wix Point of Sale in the dashboard:Go to Accept Payments in your site's dashboard.
Click Accept or enable the toggle next to Tap to Pay.
Setting up manual card entry
Before you can accept payment by manually entering your clients' credit or debit card details, you need to connect to a payment provider that supports this option.
Learn more about accepting payment using manual card entry.
Selling using POS checkout
After setting up (or without any setup for cash payments), you can start selling your store products or accepting payments of custom amounts from clients.
To sell at an POS checkout:
Go to POS Checkout in your site's dashboard.
Add items to the cart:
Add store items:Click the Products tab.
Click a product to add it to the cart.
If the product has options, select them and click Add to Cart.
Add an appointment:Click the Services tab.
Click an appointment to add it to the cart.
(Optional) Click the Edit icon next to the appointment and edit the location, staff, time, or price, and click Save.
Add a custom charge:Click the Custom charge tab.
Enter the amount you want to charge your client.
Enter a short description of what the charge is for.
Click Add to Cart.
(Optional) Assign a customer to the sale:
Note: You must add a customer for appointments to create an invoice for the order.Click Select Customer.
Select an option:Select a saved customer: Search for the client and select them.
Create a new customer:Click +Add Contact.
Enter the client's details.
Click Save.
(Optional) Add a discount:
Click Actions and Add discount:Percentage discount: Enter the percentage and click the Percent icon .
.
Amount discount: Enter the discount and click the Amount icon .
.
Click Add Discount.
(Optional) Redeem a coupon:Click Actions and Redeem a coupon.
Select a coupon and click Apply.
(Optional) Edit the tax:Click the tax amount.
Click Don't charge tax for this sale / Charge tax for this sale to turn tax collection on or off.
Click Charge.
Select how you want to receive payment.
Accept credit/debit card payment
Click Card.
Use the card reader to swipe, dip (insert) or tap the card.
Provide your customer with an invoice to serve as a receipt:
Note: You can create an invoice only for orders to which you added a customer.Go to Orders in your site's dashboard.
Click the relevant paid order.
Click the More Actions drop-down.
Select Create Invoice.
Click Create Invoice to confirm.
Share, print, or email the invoice using the links at the top.
Notes:
Before you can accept credit or debit card payment, you must connect to Wix Payments, purchase a card reader, and set up the reader so it works with your computer dashboard. Learn more
If you didn't add your customer's name to the order and you want to provide a receipt, as a workaround you can print the order.
Manually enter credit card details
Important: Entering credit card details manually is the least secure way of accepting card payments. We recommend accepting manual payment only from buyers you trust. Note that in case of fraud, it is the merchant who is liable. Learn more
To manually enter credit card details:
Click Manual Card Entry.
Enter the credit card details and click Charge.
Provide your customer with an invoice to serve as a receipt:
Note: You can create an invoice only for orders to which you added a customer.Go to Orders in your site's dashboard.
Click the relevant paid order.
Click the More Actions drop-down.
Select Create Invoice.
Click Create Invoice to confirm.
Share, print, or email the invoice using the links at the top.
Tip: If you didn't add your customer's name to the order and you want to provide a receipt, as a workaround you can print the order.
Accept cash payment
Click Cash.
Click Done.
Provide your customer with an invoice to serve as a receipt:
Note: You can create an invoice only for orders to which you added a customer.Go to Orders in your site's dashboard.
Click the relevant paid order.
Click the More Actions drop-down.
Select Create Invoice.
Click Create Invoice to confirm.
Share, print, or email the invoice using the links at the top.
Tip: If you didn't add your customer's name to the order and you want to provide a receipt, as a workaround you can print the order.
FAQs
Click a question below to learn more.
Can I enable or disable tax collect for a specific sale?
Yes, you can click the tax amount to enable or disable it. When the tax is a specific amount, click the amount to remove tax collection from the sale.
If you disabled tax and want to re-add it, just click the $0.00 tax amount to enable it.
Which Wix Bookings services can't I sell at POS Checkout?
Currently, it's not possible to sell classes or courses. In addition, you cannot accept payment using a membership or package created through Pricing Plans.