top of page

wix studio

Adding and Setting Up Flexboxes

Use flexboxes to streamline the display of your site content. Flexboxes are layout tools that are made up of responsive containers, so they automatically adjust to your visitors' screen sizes.

Step 1 | Add a flexbox

Open the Add panel to select a flexbox preset and drag it onto your page. There are many designs to choose from according to the type of content you need to display (e.g. images only, images and text, etc.)

To add a flexbox:

  1. Click Add Elements  on the left side of the Editor.

  2. Click Layout Tools.

  3. Click Flexboxes.

  4. Drag and drop your chosen flexbox onto the page.
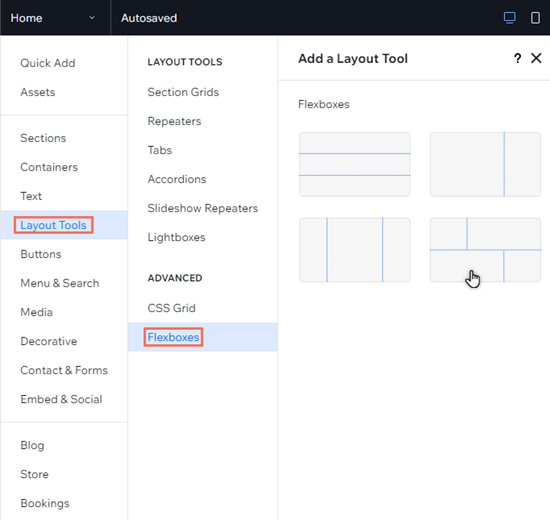
The Add elements panel in the studio editor. The cursor is hovering over a flexbox layout.

See how it works:

Drag the handles on your canvas to see how the content of the flexbox seamlessly reorganizes across breakpoints.

Step 2 | Add items to your flexbox

A flexbox is made up of several items that are responsive containers. You can change the number of items in a flexbox and it will automatically resize the items to fit the available space.

To add a new item, you can click Add Item or use the Manage Items panel in the Inspector.
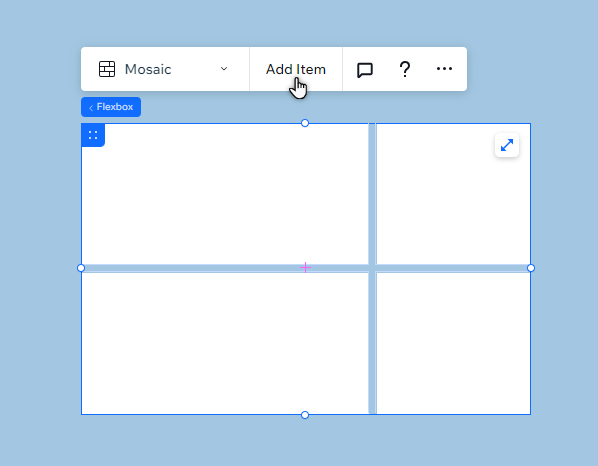
A blank flexbox in the Editor. The cursor is hovering over the Add items button.

Step 3 | Add elements to your flexbox

Choose what you want to display in your flexbox by adding adding elements to the items. You can hide or show elements on different breakpoints to create a unique experience for visitors, no matter the device.

To add elements to an item:

  1. Click Add Elements  on the left side of the Editor.

  2. Select the element type you want to add.

  3. Click your chosen element to add it to your page.

  4. Drag the element to the flexbox item, and drop it when you see Attach.
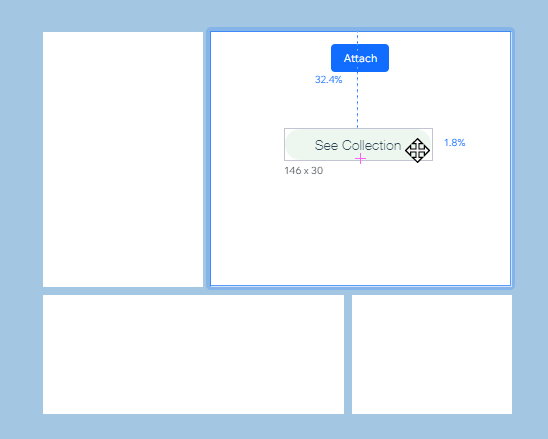
A button that has been dragged to a flexbox. The Attach message is displayed.

Need A Professional Website?
Contact Us 
Today!

Google Workspace Error Message: "Your subscription has been suspended by your reseller"

Google Workspace Error Message: Service Is Temporarily Suspended until Your Customer Accepts the New Terms of Service

Google Workspace Error Message: "You already have a Google Workspace business email account. You can manage it from the Google Admin Console"

Google Workspace: Data Migration from an External Email to Your Google Workspace

Google Workspace: Revoking Admin Status to Delete a Workspace Account

Google Workspace: Connecting Your Business Email to a Mail Client Using IMAP and SMTP

Google Workspace: Changing the Language of Your Business Email

Google Workspace: Emails Missing from Your Business Email

Google Workspace: Allowing Access for ‘Less Secure Apps’ in Your Business Email

Google Workspace: Adding Google Workspace MX Records to Your Wix Account

Google Workspace: Setting Up a Domain Alias

Google Workspace: Manually Verifying Your Domain with Google

Google Workspace: Connecting a Business Email for a Domain Pointing to Wix

Google Workspace: Setting Up an Email Alias for an Existing Workspace User Email Address

Google Workspace: Resetting a Workspace User's Password

Google Workspace: Renaming a Workspace User

Google Workspace: Accessing Your Additional Workspace Users

Google Workspace: Purchasing Additional Business Emails from Wix

Google Workspace: Setting Up Business Email Users

Gemini for Google Workspace: An Overview

Google Workspace: Upgrading a Workspace Plan

Google Workspace: Choosing a Plan

Google Workspace: Business Email Sending Limits

Google Workspace: Forwarding Emails From Your Business Email to Another Email Address

Google Workspace: Resetting Your Admin Password

Google Workspace: Accessing Your Admin Console

Google Workspace: Identifying Your Admin Workspace User

Google Workspace: Setting Up Your Business Email on Mobile Devices

Google Workspace: Username and Password Guidelines

Google Workspace: Accessing your Business Email Through Your Wix Account

wix experts
Graphic2Traffic web design
©
bottom of page