top of page

Managing store inventory

Wix Stores: Displaying an 'Out of Stock' Notice on a Product

When one of your products is out of stock, an Out of Stock message automatically appears in the Product Gallery and in the Product Page.
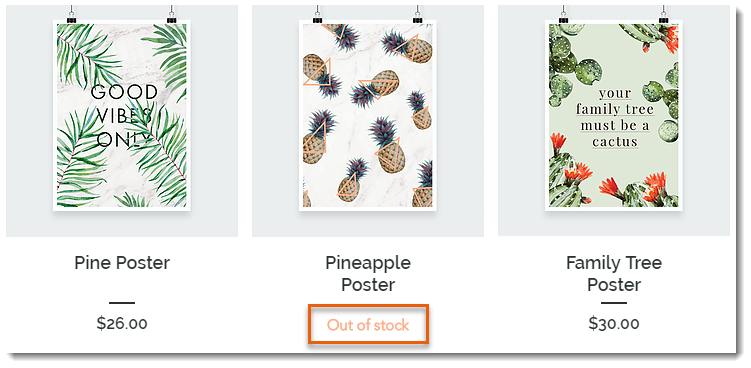
Screenshot of a Product Gallery  where the Add to Cart button text displays Out of Stock instead

Tip:

Instead of the "Out of Stock" message, you can set up back-in-stock notifications. This way, when an item is out of stock, customers see a "Notify When Available" message and can sign up to get an email letting them know when the item is available. Learn more

In this article, learn how to:

Customizing the message in Product Galleries

If you display a button in your product gallery, it changes automatically to an "Out of Stock" message when needed. You can customize the text of the "Out of stock" message.

Wix Editor

Studio Editor

  1. Go to your editor.

  2. Go to the page with the gallery you want to customize.

  3. Click the gallery on your page.

  4. Click Settings .

  5. Edit the text:Click the Text tab.
    Edit the "Out of Stock" text.

Customizing the message in the Product Page

When a product is out of stock, the Add to Cart button in the Product Page automatically changes to an Out of Stock button. The color and font of this button cannot be edited, but you can edit the message text.
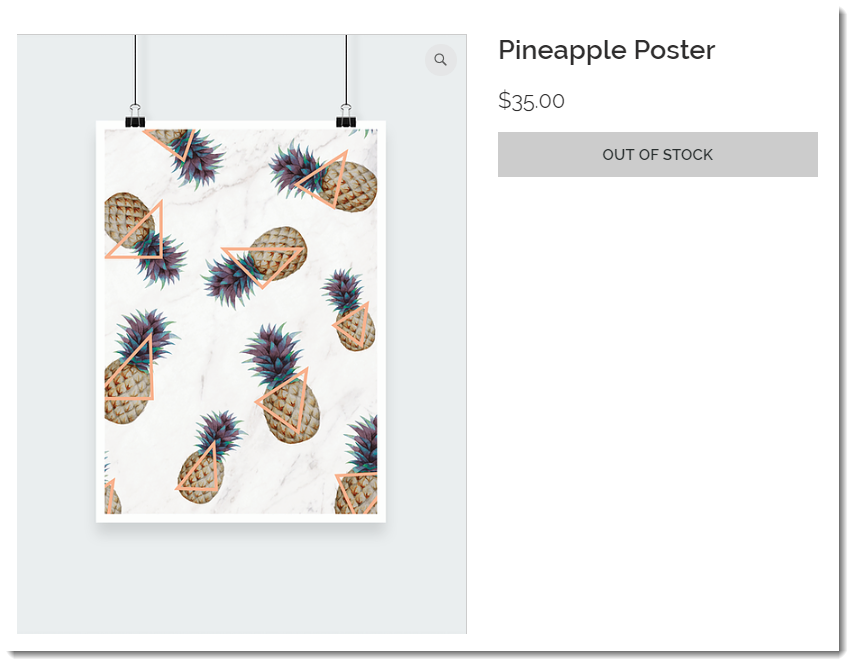
Screenshot of the Product Page where the Add to Cart button text displays Out of Stock instead

To customize the "Out of stock" message in the Product Page:

Wix Editor

Studio Editor

  1. Go to your editor.

  2. Go to your Product page:Click Pages & Menu  on the left side of the editor.
    Click Store Pages.
    Click Product Page.

  3. Click the Product Page element on your page.

  4. Click the Text tab.

  5. Edit the "Out of Stock Message" text.

Need A Professional Website?
Contact Us 
Today!

Pricing Plans: Editing the Text in Your Pricing Plans Page

Pricing Plans: Reordering How You Display Your Plans

Pricing Plans: Allowing Clients to Cancel Plans

Pricing Plans: Making Site Pages Members-Only

Pricing Plans: Connecting a Plan to Content and Services

Pricing Plans: Editing an Existing Plan

Pricing Plans: Offering Your Clients a Free Trial Period

Pricing Plans: Creating a Free Plan

Pricing Plans: About Recurring Plans

Pricing Plans: Creating a Recurring Payment Plan

Pricing Plans: Creating a One-Time Payment Plan

Pricing Plans: Collecting Additional Information at Checkout

Pricing Plans: Allowing Guest Checkout on Your Site

Pricing Plans: Adding and Setting up a Loyalty Program

Pricing Plans: Automatically Creating Invoices for Purchased Plans

Pricing Plans: Adding the My Subscriptions Page to Your Site

Pricing Plans: Upgrading Your Site to Sell Plans Online

Pricing Plans: Managing Notifications You Send and Receive

Pricing Plans: Setting Up Tax Collection

Pricing Plans: Setting Up Payments

Pricing Plans: Adding the Pricing Plans App

Pricing Plans: An Overview

Check-in by Wix: Receiving Push Notifications on Your Mobile Device

Check-in by Wix: Adding People to an Event Guest List

Check-in by Wix: Checking in Guests to an Event

Check-in by Wix: Adding and Managing Staff Members

Check-in by Wix: Downloading the App

Check-in by Wix: An Overview

Wix Events: Creating Tickets for an Event Using the Wix App

Wix Events: Creating an Event Schedule in the Wix App

wix experts
Graphic2Traffic web design
©
bottom of page