


Using the Wix app for Wix Stores
Wix Stores: Canceling and Refunding Orders Using the Wix App
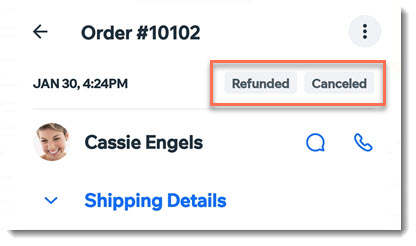
Using the Wix mobile app you can handle cancellations and refunds from wherever you are. After you cancel and/or refund an order, the order status updates to reflect the change.
Important:
Once an order status is changed to canceled and/or refunded, the status cannot be changed back.
In this article, learn how to:
Canceling and refunding an order
You can process PayPal or Stripe refunds right from the Wix mobile app. Other orders must be refunded outside of Wix. Follow the instructions below to update your records.
To cancel and refund an order:
Go to your site in the Wix app.
Tap Manage
 at the bottom.
Tap Sales.
Tap Orders.
Tap the relevant order.
Tap the More Actions icon
 at the top right.
Select Issue refund.
Select an option:
Cancel and refund manual orders
Make sure to contact your customer and refund the money.
Deselect the checkmark next to any products you do not want to refund.
Tip: You can later enter a refund amount.(If you track inventory) Enable or disable the Update Inventory toggle.
(Optional) Tap Edit Amount to enter a custom refund amount.
Tap Next.
Select a refund explanation from the Select drop-down.
Enable or disable the Send a confirmation email to customer toggle.
(Optional) Enter a note to your customer.
Tap Next.
Tap Issue Refund to confirm.
Note: This cannot be undone.
Cancel and refund orders paid through PayPal, Stripe, or Wix Payments
If more than one item was purchased, select what you want to refund and cancel:
Select an option:Clear the checkbox next to a product to remove it from the refund.
Click Edit Quantity and enter a product quantity number (use if client bought, for instance, two of a product and you want to refund one).
Tap Next.
(Optional) Edit the refund amount.
(If you track inventory) Enable or disable the Update Inventory toggle.
(Optional) Select the reason you provided a refund from the Refund Reason drop-down.
(Optional) Notify your customer:Enable the Send a confirmation email.
(Optional) Enter a note to your customer. The note appears in the confirmation email.
Tap Apply.
Tap Cancel Order.
Note: This action cannot be undone.
Cancel and refund orders paid through other payment methods
Go to the dashboard of the payment provider and refund the order. When you're done, go back to the app to change the status to "canceled and refunded".
Tap to enable the Mark order as Refunded toggle.
(Optional) Edit the refund amount.
Important: This does not refund your customer. It only marks the order as refunded in your dashboard.Tap Next.
Tap Confirm.
Note: This action cannot be undone.
Canceling an order
You can choose to cancel an order if, for example, customers change their minds and no longer want an unpaid order.
To cancel an order:
Go to your site in the Wix app.
Tap Manage
at the bottom.Tap Sales.
Tap Orders.
Tap the More Actions icon
at the top right.Tap Cancel Order.
(Optional) Notify your customer:Enable the Send a confirmation email.
(Optional) Enter a note to your customer. The note appears in the confirmation email.
Tap Next.
Tap Cancel Order.
Refunding an order
You can refund an order to reimburse a customer who isn't fully satisfied with a product.
To refund an order:
Go to your site in the Wix app.
Tap Manage
at the bottom.Tap Sales.
Tap Orders.
Tap the relevant order.
Tap the More Actions icon
at the top right.Tap Issue Refund.
If there is more than one item in the order, select the products and quantities you want to refund.
(If you track inventory) Enable or disable the Update Inventory toggle.
Tap Next.
Select an option:
Refund manual orders
Make sure to contact your customer and refund the order.
(Optional) Select an option from the Refund Reason drop-down.
Enable or disable the Send a confirmation email to customer toggle.
Tap Next to mark your order as canceled and refunded.
Tap Cancel Order to confirm.
Note: This cannot be undone.
Refund orders paid through PayPal, Stripe, or Wix Payments
Optional) Select an option from the Refund Reason drop-down.
(Optional) Notify your customer:Enable the Send a confirmation email.
(Optional) Enter a note to your customer. The note appears in the confirmation email.
Tap Next.
Tap Issue Refund
Refund orders paid through other payment methods
Go to the dashboard of the payment provider and refund the order. When you're done, go back to the app to change the status to "refunded".
Tap to enable the Mark order as Refunded toggle.
(Optional) Edit the refund amount.
Important: This does not refund your customer. It only marks the order as refunded in your dashboard.Tap Next.
Tap Confirm.
Note: This action cannot be undone.