


Taking online orders (NEW)
Wix Restaurants: Managing Incoming Orders with the New Wix Restaurants Orders App
Important:
This article is about Wix Restaurants Orders (New), Wix's new online ordering app.
For info on the previous online ordering app, click here.
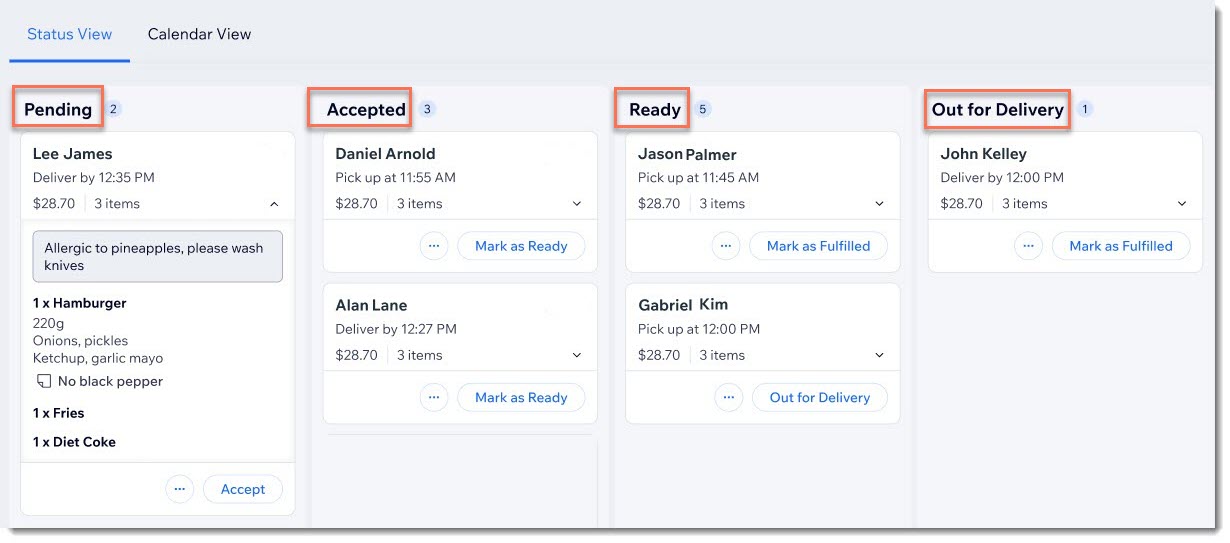
Manage your incoming orders via your site's dashboard or the Wix app. View your orders in real time, accept them with a swipe, and get instant notifications. You can access order details, pricing, and the option to print, email, or reject if needed.
Step 1 | Receive the order notification
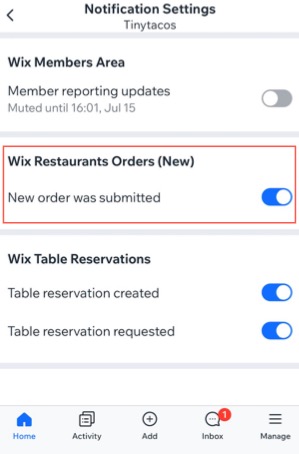
When an order comes in, you'll receive an email notification. You can also customize additional notification types, including real-time alerts on your phone via the Wix app. Download the app to start receiving mobile notifications on your iPhone or Android.
Step 2 | Accept or reject the order
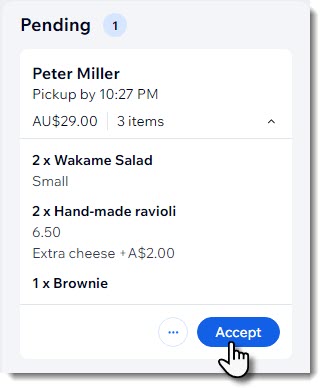
To get started, click Accept on an incoming order to move it to the 'Accepted' column. You can see at a glance what was ordered as well as any customer notes or modifications.
To accept or reject an order:
Dashboard
Wix app
Go to Online Orders in your site's dashboard.
Choose what you want to do:Accept: Click Accept.
Reject: Click the More Actions icon under the relevant order.Select Cancel order.
Choose whether or not to send an email about the cancellation:Send an email: Select the Send a confirmation email to customer checkbox and enter a short note.
Don't send an email: Deselect the Send a confirmation email to customer checkbox.
Click Continue.
Click Cancel order.
Note: This cannot be undone.
Accepting pre-orders?
If you accept orders days in advance, you can also click the calendar view to view upcoming orders by date.
Step 3 | Get the order ready
Now you can get to work preparing the order for your customer.
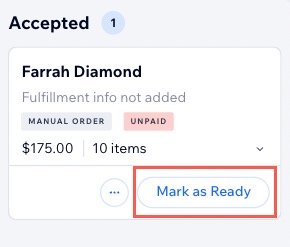
As soon as it's done, click Mark as Ready so it can be delivered or picked up. If it's a delivery order, your customer will see a Ready status on the tracking page.
Dashboard
Wix app
Go to Online Orders in your site's dashboard.
Tap Mark as Ready under the relevant order in the Accepted column.
Tips:
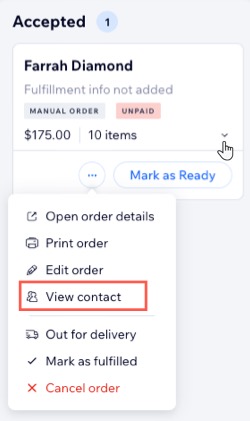
Click the arrow at the bottom right to expand or collapse the order details.
Click the More Actions icon
under the relevant order and select View contact to see customer details.
Step 4 | (Optional) Edit the order
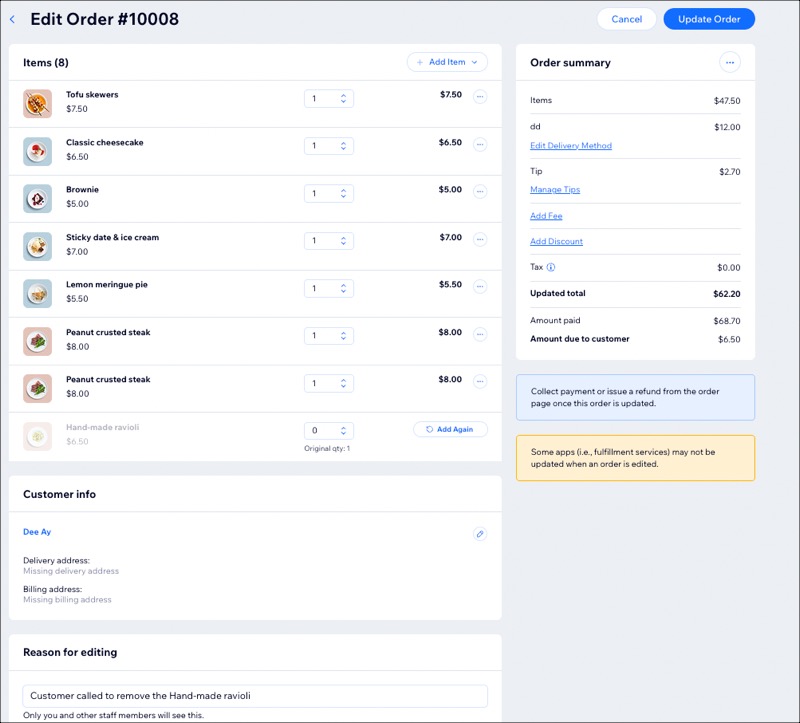
You can edit your customer's order as needed if they made a mistake or requested changes after checkout. Add items, update prices, or revise customer details. Additionally, you can include a reason for the edit, that only you and other staff members see.
To edit an order:
Dashboard
Wix app
Go to Online Orders in your site's dashboard.
Click the More Actions icon
under the relevant order.Click Edit order.
Make the necessary edits.
Click Update Order.
(Optional) Select or deselect the checkbox next to Email the customer about changes made to this order.
Click Update Order to confirm the changes.
(If needed) Refund or collect payment directly from the updated order page.
Step 5 | Complete the order
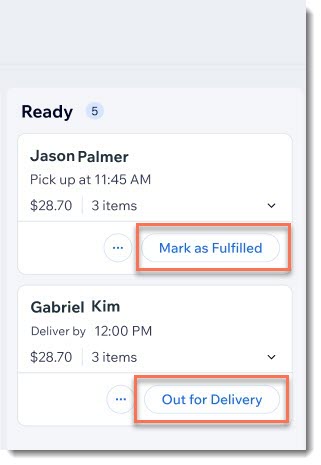
In the Ready column, you'll see one or both of these options: Mark as Fulfilled for pickup orders and Out for Delivery for delivery orders.
Marking an order as fulfilled removes it from the screen.
To complete an order:
Dashboard
Wix app
Go to Online Orders in your site's dashboard.
Depending on the order type, follow the steps:Delivery orders: Click Out for Delivery when the courier collects the order, and Mark as Fulfilled when the customer receives it.
Pickup orders: Click Mark as Fulfilled when an order is picked up.
FAQs
Click a question below to learn more.
Where can I see orders that are fulfilled, canceled, or overdue?
All orders you receive, no matter what the status, appear in the Orders tab. To find an order more quickly, you can search by the customer's name or filter your orders.

How can I cancel or refund an order?
If you need to cancel or to cancel and refund an order, you can start the process in the Online Orders tab.
Go to Online Orders in your site's dashboard.
Click the More Actions icon
 next to the relevant order.
Select Cancel order or Cancel and refund order.

Can I assign DoorDash Drive for delivery of an order placed over the phone?
Yes. Once you’ve entered the details for a manual order (e.g. over the phone), you can assign DoorDash Drive to handle the delivery.
Note: DoorDash Drive is available only for prepaid orders.
Go to Online Orders in your site's dashboard.
Click the More Actions icon
.Select Delivery with DoorDash Drive.
Click Yes, Continue to update the delivery method to DoorDash Drive.
Enter the time for How soon should a driver pick up the order?.
Click Submit.
