


File Share
Wix Apps: Managing Permissions Per Folder in the Wix File Share App
You can set the permissions for each individual folder contained in your site's File Share app. This means that you restrict access to certain folders for some members, or groups and plans that you have created in the Back Office.
For example, let's say you work in a school and you have a folder just for teachers, you can change the permissions to ensure that only teachers in the school have access to that particular folder.
Disclaimer:
This article focuses on Folder permissions. Learn about File Share Library permissions.
In this article, learn more about:
Levels of access permissions
You can choose the level of access you want to give a particular member, group, or plan. The levels are:
View: Provides limited access to open, view, and download files in the folder.
Upload: Provides the ability to add new files to the folder, and to view and download files.
Manage: Provides the ability to add new files, manage folders, and give permissions to others to use access the folder.
Each "file owner" will always be able to see his own file regardless of the folder permissions you give them.
Notes:
Permissions can only be managed at the root folder level and applies to all sub folders under it.
To restrict a folder to specific members/groups/plans — you must remove "all members" or "site visitors", or both.
Managing permissions from your site's dashboard
Go to File Share in your site's dashboard.
Click the More Actions icon
 next to the relevant folder.
Click Permissions.
Type in the name of the member/group/plan you want to add to this folder in the search bar.
Select a member/group/plan to edit.
Click the drop-down on the right to assign permissions.
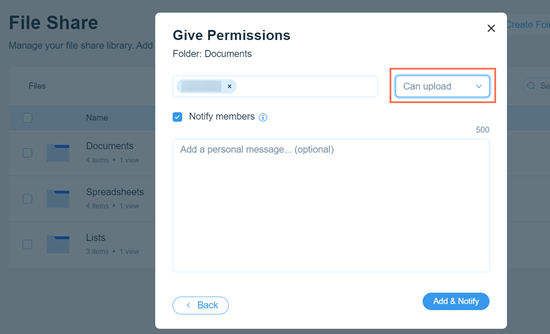
(Optional) Select the Notify members checkbox to notify the members you are giving permissions to.
Click Add & Notify.
(Optional) Click the drop-down beside any unwanted groups and select Remove to remove their permissions.
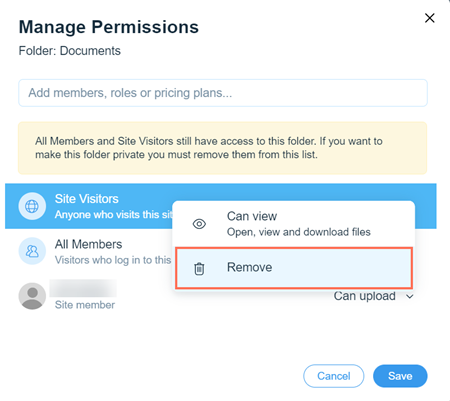
Click Save.
Managing permissions on your live site
Go to the File Share app on your live site.
Log in using the email address associated with your Wix account.
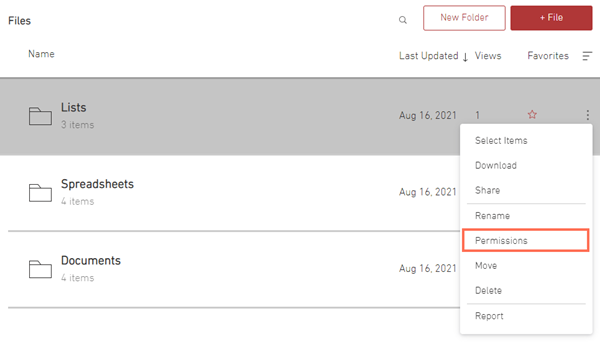
Click the More Actions icon
next to the folder you want to edit.Click Permissions.
Type in the name of the member/group/plan you want to add to this folder in the search bar.
Select a member/group/plan to edit.
Click the drop-down on the right to assign permissions.
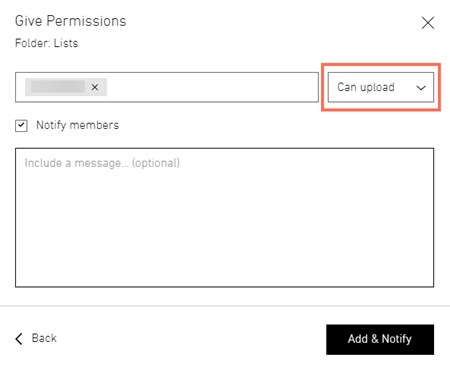
(Optional) Select the Notify members checkbox to notify the members you are giving permissions to.
Click Add & Notify.
(Optional) Click the drop-down beside any unwanted groups and select Remove to remove their permissions.
Click Done.