


Designing your plans pages
Pricing Plans: Displaying Different Plan Types Using Tabs
Streamline your customer experience by displaying your different pricing plans using tabs. For example, you can display your monthly and yearly plans using separate tabs. This makes it quicker and easier for your customers to find the plan that's right for them.
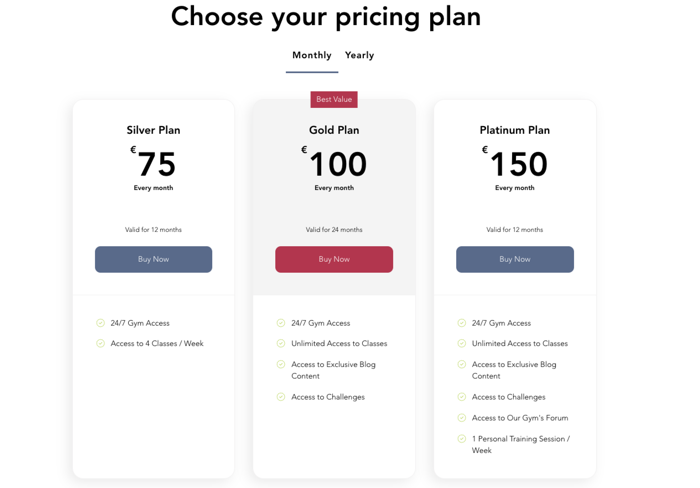
Step 1 | Add tabs to your site
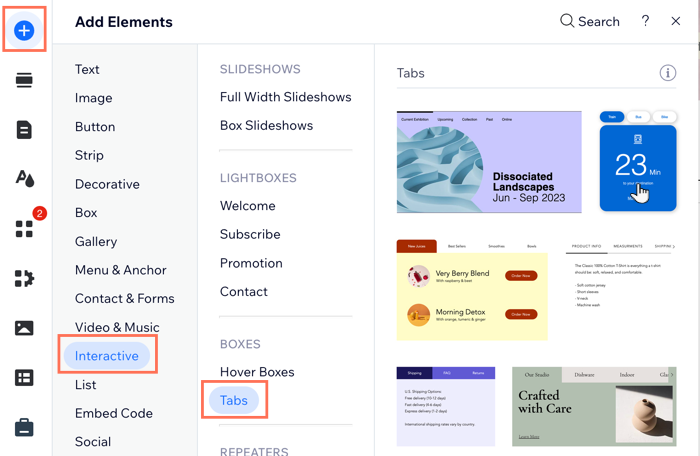
Start by adding the tabs element to the relevant page on your site.
To add tabs:
Click Add Elements
on the left of the Editor.
Click Interactive.
Click Tabs under Boxes.
Click and drag your chosen tab design to add it to your page.
Step 2 | Name your tabs
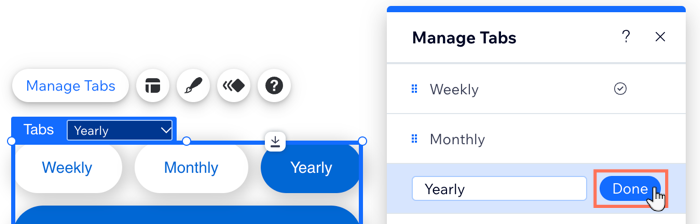
Now that you've added the tabs to the relevant page on your site, give each tab the correct name, so your customers can quickly find the right pricing plan type for them. For example, you can name the tabs according to payment frequency, for example: weekly, monthly, and yearly.
To name your tabs:
Click the tabs element in your Editor.
Click Manage Tabs.
Hover over the relevant item in the panel.
Click the More Actions icon
.
Click Rename.
Enter the new name into the field.
Click Done.
Repeat steps 3 -7 for each tab you display.
Step 3 | Add the pricing plans elements to your tab items
After naming your tabs, add the pricing plans elements to all the tabs, and then customize each one to display the relevant pricing plans.
To add elements to your tabs:
Click the tabs element in your Editor.
Open the relevant tab item from the drop-down.
Click Add Elements on the left side of the Editor.
Click Payments.
Click either Plan List or Single Plan under Pricing Plans.
Drag the relevant element onto the tab.
Drop the element when you see the Attach to Tab message.
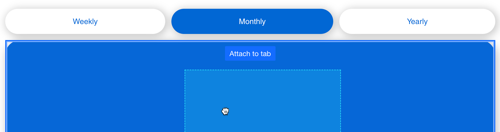
Repeat steps 2 - 7 for each tab.
Step 4 | Choose what plans to display in each tab
Now that you have pricing plans widgets added to each of your tabs, you can choose the relevant plans you want to display on each widget on each tab.
To choose what plans to display in each tab:
Click the tabs element in your Editor.
Select the first tab from the drop-down.
Click to select the pricing plans element you added.
Choose which plans to display, depending on which pricing plans widget you chose for each tab.
Plan List
Click the Plan List widget in the tab.
Click Settings.
Click Plans.
Select the checkbox next to each plan you want to display in the selected tab.

Single Plan
Click the Single Plan widget in the tab.
Click Settings.
Click the drop-down and select the plan you want to display.
